It’s a funny thing, isn’t it? We get so used to those papery, sometimes-bland garlic bulbs from the grocery store, we forget what real garlic tastes like. Maybe you’ve thought about growing your own but pictured it being complicated, or you tried once and ended up with cloves no bigger than your thumbnail. It can feel a little defeating when your kitchen dreams don’t quite match what comes out of the soil.
Well, I’m here to set the record straight and invite you into my kitchen, so to speak. Growing your own garlic is truly one of the simplest and most rewarding things you can do in your yard. It asks for so little and gives back so much. I’m going to walk you through everything, from picking the right kind to planting it this fall and pulling up those beautiful, pungent bulbs next summer. This is the definitive guide on how to grow garlic, and I promise you, it’s easier than you think.
The Simple Truth About How to Grow Garlic
The first secret to garlic is its calendar. It’s not a summer crop. Garlic is a patient plant. You plant it in the fall, when the air gets crisp and the other plants in your yard are starting to think about a long winter’s nap.
You tuck the cloves into the soil, cover them with a warm blanket of mulch, and then… you mostly forget about them. They’ll settle in, send down roots, and sleep through the coldest months. Then, come spring, just when you’re itching to get back outside, you’ll see their little green shoots pushing up through the mulch. It’s the first promise of the good things to come.
From there, they just grow. They don’t need fussy pruning or complicated trellises. They just need a bit of sunshine, a little water, and your patience.
Preparing Your Garden Spot for Garlic
 Garlic isn’t picky, but it does love two things: sunshine and good, loose soil. Find a spot in your yard that gets at least six full hours of sun a day. This is non-negotiable. That sunshine is what fuels the plant to create a big, beautiful bulb underground.
Once you have your sunny spot, it’s time to think about the soil. Garlic hates “wet feet,” which is just a garden term for roots sitting in heavy, soggy clay. It needs soil that drains well.
Before you plant, work some amendments into the top six to eight inches of your bed. My favorite has always been well-rotted compost or aged manure. You don’t need anything fancy from a bag. This feeds the soil, but more importantly, it makes it light and fluffy. Your goal is to create a bed that a garlic bulb can easily swell up in, without having to fight against compacted earth. You’ll know the soil is right when you can grab a handful and it smells sweet and earthy, and crumbles easily in your hand.
Choosing the Right Garlic to Plant
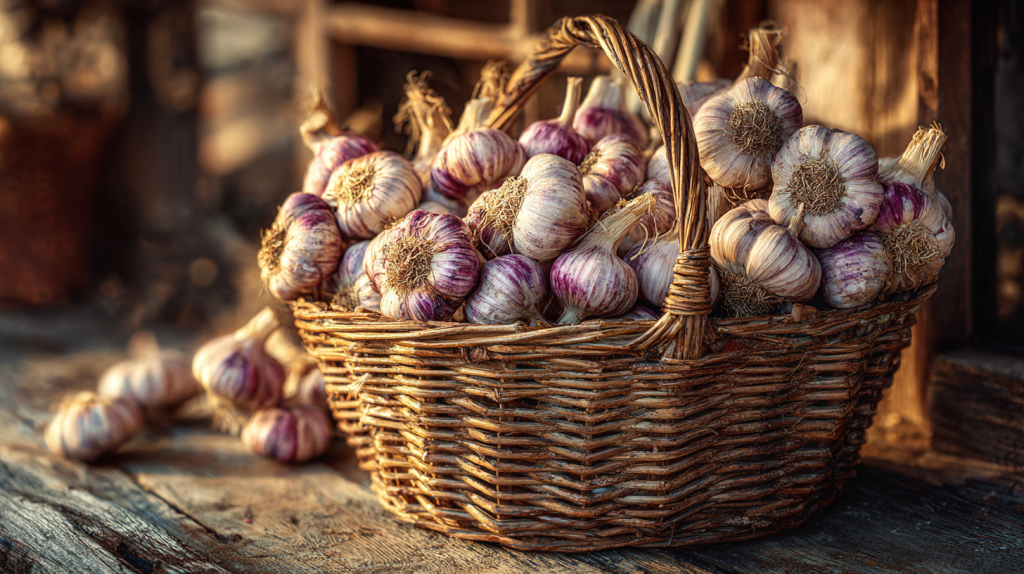
This is where half the fun is. You’ll find two main families of garlic: Hardneck and Softneck.
Hardneck Garlic: This is the kind I grow most often. It gets its name from the stiff, woody “neck” or stem that grows right up the center. These varieties (like ‘Music’ or ‘German Extra Hardy’) are known for having fewer, but much larger, cloves. The flavor is often more complex and fiery. They are also wonderfully cold-hardy, which makes them perfect for those of us who get a real winter. The other wonderful thing they give you is a “bonus” harvest of garlic scapes in the spring, which we’ll talk about.
Softneck Garlic: This is the kind you almost always find at the supermarket. It has a softer, papery stem that can be braided, which is lovely. Softnecks (like ‘California Early’) tend to have many more cloves, often in smaller, layered rows. They store for a very long time—sometimes up to a year—and have a milder flavor. They grow best in places with milder winters.
Which one is for you? If you have cold winters and want robust flavor, choose a Hardneck. If you have mild winters and want garlic that stores forever, choose a Softneck. Or, do what I do, and plant a little of both.
Insider Secret: Don’t Plant Grocery Store Garlic
Now, it’s tempting, I know. You see a bulb at the store, maybe it’s even sprouting a little green shoot, and you think, “I’ll just stick this in the ground.” Please don’t.
First, that garlic is almost always a Softneck variety chosen for shipping and shelf life, not for your specific climate. Second, and more importantly, they are often treated with a growth inhibitor to keep them from sprouting on the shelf. This means they will either fail to grow or will grow with very little vigor. Always buy your “seed garlic” from a reputable nursery, a farmer’s market, or an online supplier. This garlic is certified disease-free and is meant to be planted.
The Planting Process: A Fall Ritual
The best time to plant is in the fall, about three to six weeks before your ground freezes solid. For most of us, this means sometime in October or even early November. You want to give the clove enough time to send down roots, but not so much time that it sends up a lot of green growth that will just get zapped by the frost.
About a day before you plant, “pop” your garlic bulbs. This just means separating the individual cloves from the main bulb. Be gentle. Try to leave the papery skin on each clove as intact as possible.
Look at your cloves. You’ll see a flat “basal plate” on the bottom (that’s where the roots were) and a pointy tip on the top. This is very important.
A Step-by-Step on How to Grow Garlic Cloves
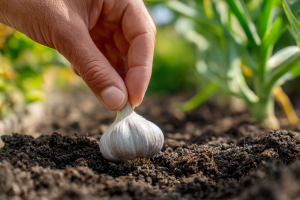
- Dig Your Furrows: In your prepared bed, make shallow trenches about two to three inches deep. If you’re planting multiple rows, keep the rows about eight to twelve inches apart. Garlic likes its space.
- Space Your Cloves: Take your individual cloves and press them into the soil, pointy-side up. This is the single most important rule. The green shoot comes from the point, and the roots come from the flat bottom. If you plant it upside down, the poor thing will waste all its energy trying to right itself.
- Give Them Room: Space each clove about six inches apart in the row. It seems like a lot of space, but remember, you want a big bulb. That bulb needs room to swell. This is a common mistake; planting too close gives you a harvest of small, undersized garlic.
- Cover and Water: Gently cover the cloves with soil, patting it down lightly. Give the bed a good, deep watering to help the cloves settle in and wake up the roots.
Mulching: The Secret to a Happy Winter
After you plant and water, it’s time to tuck your garlic in for the winter. This is my second “non-negotiable” rule.
Cover your entire garlic bed with a thick, four- to six-inch layer of mulch. My favorite is clean straw (not hay, which is full of seeds), but shredded leaves or pine shavings work beautifully, too.
This “winter quilt” does two crucial things. It keeps the soil moisture even. But more importantly, it prevents the ground from “heaving.” Ground-heave happens when the soil freezes, thaws, and refreezes, which can literally push your little garlic cloves right out of the earth. The mulch keeps the soil temperature stable, protecting your future harvest.
Caring for Your Garlic Patch (It’s Easier Than You Think)
Come spring, you’ll see the green shoots piercing the mulch. It’s a glorious sight.
From here, your job is simple. Garlic doesn’t like to compete, so keep the patch well-weeded. The mulch will help a lot with this, but just pull any ambitious weeds that pop through.
Water your garlic patch when it’s dry, giving it about an inch of water a week. A good, deep soak is better than a shallow sprinkle. Keep this up through the spring as the bulbs are forming. Then, and this is important, stop watering about two to three weeks before you plan to harvest. This tells the garlic it’s time to start drying out and forming its protective outer wrappers.
The Bonus Harvest: What to Do with Garlic Scapes
If you planted Hardneck garlic, you get a special treat in late spring or early summer. The plant will send up a central stalk that curls and forms a little flower bud at the end. This is the “garlic scape.”
You must cut these off. If you let them grow, the plant will put all its energy into making that flower instead of making a big bulb. Simply snip the scape off near the top leaves.
But don’t you dare throw them away! These scapes are a culinary delight. They have a mild, fresh garlic-asparagus flavor. You can chop them up and put them in salads, stir-fries, or omelets.
How to Grow Garlic: Harvesting and Curing
This is the moment we’ve all been waiting for. All that patience is about to pay off. But how do you know when it’s ready?
Knowing When It’s Time to Harvest
Don’t wait for the entire plant to die back. If you do that, the bulb underground will have split its wrappers and won’t store well.
The magic signal is in the leaves. When the bottom three or four leaves have turned brown and dry, but the top five or six are still green, it’s time. This usually happens in mid-summer, depending on your climate.
Don’t just pull! The stem will snap. Gently loosen the soil around the bulb with a garden fork, being careful not to pierce the garlic itself. Then, lift the entire plant from the ground. Brush off the excess soil, but do not wash the bulbs.
Pro-Tip: A Guide to Curing
“Curing” is simply the process of letting the garlic dry down, which is what makes it last for months in your pantry. It’s the most important step for storage.
You must cure your garlic in a place with good air circulation, out of direct sunlight, and protected from rain. A covered porch, a dry garage, or a well-ventilated barn is perfect.
I gather the garlic plants in bundles of five or six and tie them with string. Then, I hang the bundles from the rafters. You can also lay them flat on a mesh screen or a rack. Just make sure air can move all around them. Let them hang like this for at least three weeks, and up to six.
Common Mistakes to Avoid When Growing Garlic
I’ve seen a few mishaps over the years, and they are almost always avoidable.
- Planting at the Wrong Time: Planting in the spring is the most common mistake. Spring-planted garlic almost never has time to form a full bulb. It’s a fall-planted crop.
- Not Mulching: I’ve seen it time and again. A neighbor forgets to mulch, and a winter of freezing and thawing pushes half their cloves to the surface.
- Watering Too Late: Watering right up until harvest will give you garlic that is more likely to rot. Remember to stop watering a few weeks before you dig.
- Improper Curing: Tossing fresh garlic into a basket in the kitchen is a recipe for mold. You must let it cure in a dry, airy place for several weeks before trimming it.
- Not Giving Enough Space: We all get greedy for space in the garden, but crowding garlic cloves six inches apart is the absolute minimum. Give them eight, and they’ll thank you for it.
Storing Your Garden Bounty
You’ll know the garlic is fully cured when the outer wrappers are papery and dry, the stems are stiff, and the roots are brittle.
Now you can “clean” them. Cut the stems off about an inch above the bulb (unless you’re braiding softnecks). Trim the dirty roots off with scissors. Rub off the outermost, dirty layer of skin, and you’ll have a beautiful, clean bulb.
Store your harvest in a cool, dark, and dry place. A pantry, a cellar, or a cool basement is ideal. Do not store it in the refrigerator; the humidity will make it sprout.
When you’ve done this, you’ll have your own garlic to last you through the fall, winter, and into the next spring. And when you roast that first head, and your whole house fills with that rich, sweet aroma, you’ll understand. There is simply nothing better than the food you grow with your own two hands.
There you have it. That’s the whole story. You see? There’s no great mystery to it. Learning how to grow garlic is mostly about patience and a little bit of good timing.
You’ve learned to plant in the fall, to tuck your cloves in with a blanket of mulch, to be patient as they grow, and to harvest and cure them for the pantry. The most wonderful part is that for months and months, every time you reach for a clove of garlic, you’ll have a little moment of pride. You did that. And believe me, your cooking will never be the same.