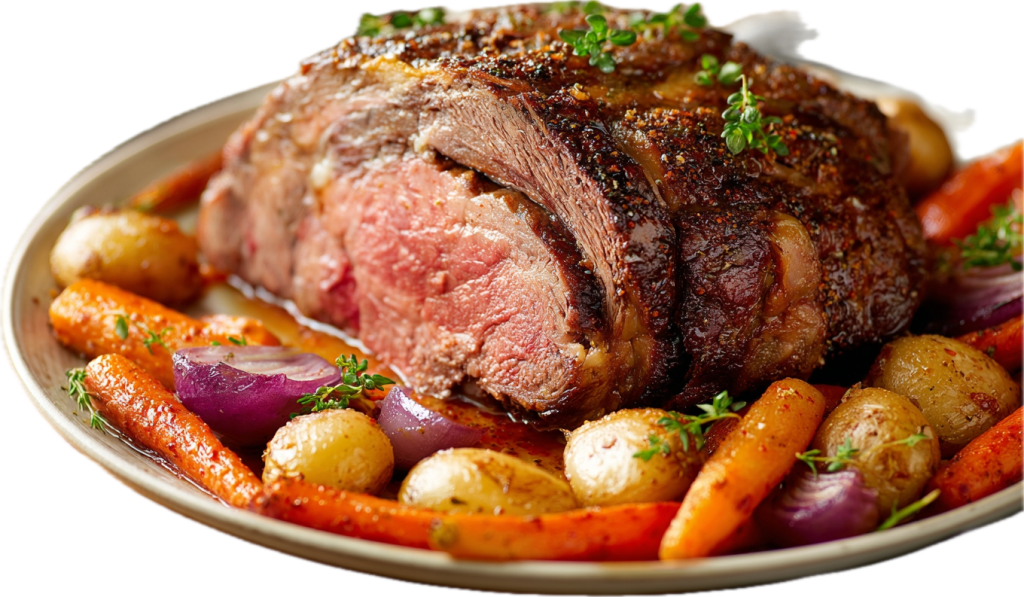
A cross rib roast recipe done right is one of the most satisfying meals you can set on a table — rich, deeply flavored, and so tender the meat practically gives way the moment you look at it. The trouble is, most people either overcook it or undercook it, and they end up with something tough enough to sole a boot. I am going to show you how to avoid all of that.
This cut asks something of you that a lot of modern cooking refuses to — it asks for your patience. But if you give it what it wants, it gives back something extraordinary. You will learn exactly what to watch for, when to leave it alone, and how to know it is done before you ever pick up a thermometer.
Whether this is your first roast or your fiftieth, pull up a chair. We are going to get this right.
The Cut That Built Sunday Dinner in the South
The cross rib roast — sometimes called the shoulder clod roast, the cross rib pot roast, or the English roast depending on where you grew up — comes from the chuck section of the shoulder. It is a hardworking muscle, full of connective tissue and deep, beefy flavor. It is also the kind of cut that has fed Southern families for generations not because it was fancy, but because it was honest and affordable and, in the right hands, absolutely magnificent.
My grandmother used to say that the cuts other people passed up were the ones worth knowing. The cross rib roast is exactly that. The butcher would set it aside for families who knew what to do with it. You had to earn that knowledge. You had to learn that low heat and time would turn all that connective tissue into something silky and rich, and that the liquid in the pan would become a gravy worth mopping up with every last bit of cornbread on the table.
Do Not Rush – Slow And Done Is Best
I first made this roast on my own when I was newly married, following the directions my mother had written on a piece of notebook paper. No measurements. Just “cook it low until it’s done.” I burned it the first time because I was impatient. I ruined a good piece of meat and a Sunday afternoon both. The second time I made it, I sat down and let it go at 325°F for four hours without opening the oven. When I pulled it out and lifted that foil, the whole kitchen smelled like Sunday was supposed to smell. I have never rushed it since.
For a full picture of the techniques and traditions that inform everything from pot roasts to smothered cuts, The Complete Guide to Southern Cooking: Techniques, Traditions & Time-Tested Wisdom is where I would send you first.
What This Roast Is Made Of — And Why Every Part Matters
You do not need much to make a great cross rib roast. The ingredients list is short, but what you do with each one matters more than how many you use.
The roast itself should be somewhere between three and five pounds. Smaller than that and it dries out too quickly. Larger than that and you need to add cooking time or break out the Dutch oven. A bone-in roast will give you a little more flavor from the marrow seeping into the pan juices, but boneless cooks more consistently and is easier to carve. Either one works here.
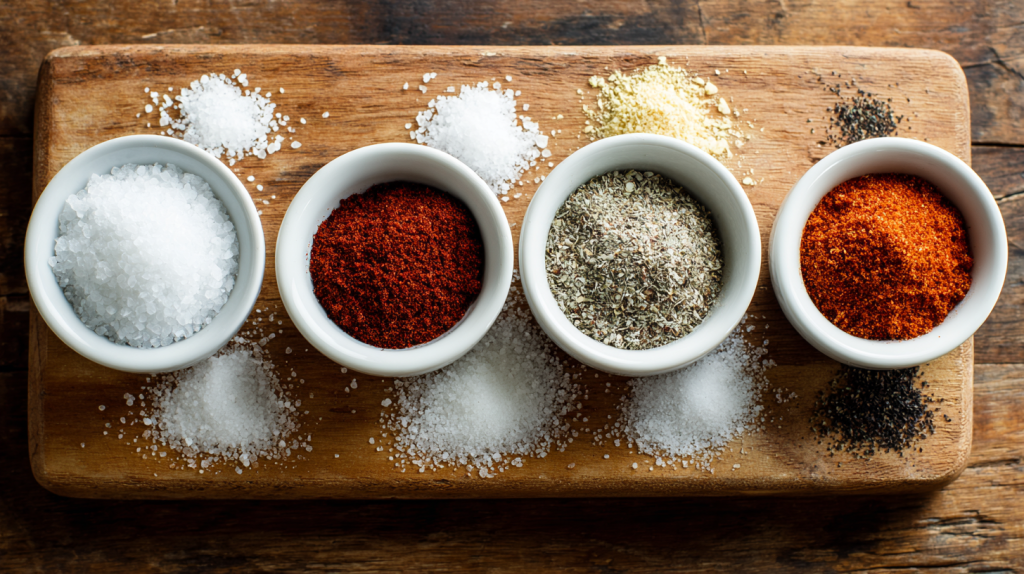
Select Your Seasons Well, And Use Salt!
Salt is your most important seasoning, and it needs to go on early enough to do its work. When I have the time, I salt the roast the evening before and let it sit uncovered in the refrigerator overnight. That salt pulls moisture to the surface, dissolves, and then gets drawn back into the meat, seasoning it from the inside. If you are short on time, even an hour makes a difference over salting it right before it hits the pan. If you want to understand the full science and tradition behind this, Brining 101: The Secret to Juicy Fried Chicken and Pork Chops covers the principles in depth.
Smoked paprika in the rub does something subtle but important — it gives the crust a faint smokiness that makes people think the roast spent time near a fire. It pairs beautifully with the natural richness of the beef. Do not skip it, and do not substitute sweet paprika unless that is all you have.
Braising With A Dash of Red Wine is Best
The braising liquid is simple on purpose. Beef broth, water, aromatics. You want the beef to be the star. Too much going on in the liquid, and you end up with a murky, confused flavor. The onion, garlic, thyme, and bay leaves give depth without competing. If you happen to have a splash of red wine, it goes in beautifully with the broth. If not, the broth and water will serve you just as well.
Quick Substitution Guide:
- No beef broth → Use chicken broth or vegetable broth; the flavor will be lighter but still good
- No fresh thyme → Half a teaspoon of dried thyme works fine
- No smoked paprika → Regular paprika plus a tiny pinch of cayenne is a decent stand-in
- No bacon grease for searing → Any high-smoke-point oil works; bacon grease just adds a little something extra
How to Cook a Cross Rib Roast That Falls Apart the Way It Should
This is where I walk with you, step by step, and tell you what I would tell my own daughter standing at the stove.
Getting the Roast Ready
The single most overlooked step in making a good roast is pulling it out of the refrigerator early. I am talking about 30 to 45 minutes before it goes anywhere near heat. A cold roast thrown into a hot pan will seize and cook unevenly — the outside will overcook before the center has a chance to warm up. Take it out. Let it breathe. This is not negotiable.
Then dry it. I mean really dry it. Paper towels, pressed firmly all over the surface. Any moisture left on that meat will turn to steam the second it hits the hot pan, and steam is not going to give you the crust you want. The crust is where the flavor lives. Moisture is the enemy of crust. Pat it dry like you mean it.
Mix your rub and press it into every surface of that roast. Under any flaps of fat, into any crevices, along the sides. You want seasoning on every part that is going to be on a plate. This is the only chance the outside of the meat has to get flavor before it goes in the oven.
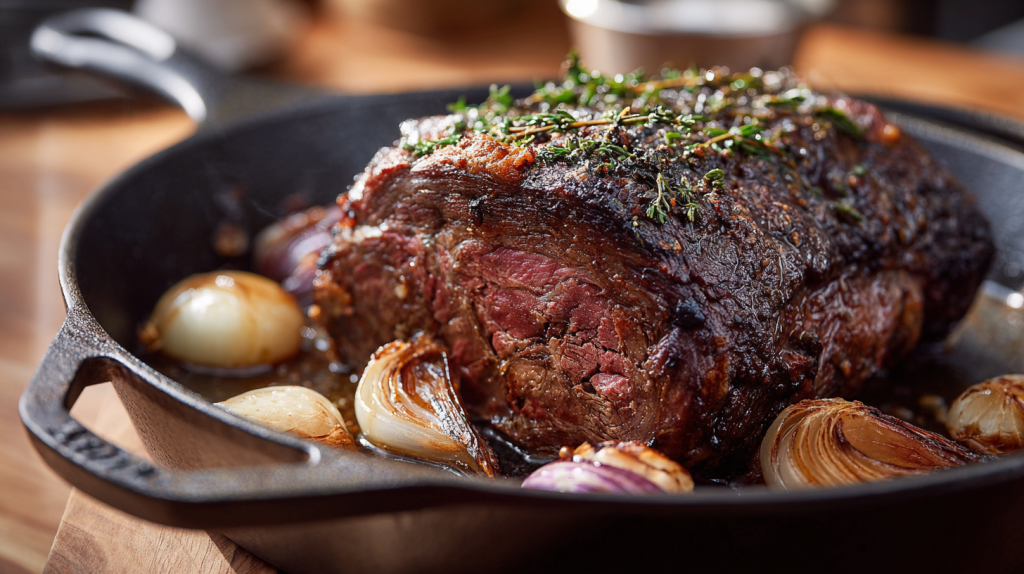
The Sear — Don’t You Dare Skip It
Get your cast iron or your heaviest pan over high heat. Add your oil or bacon grease and let it heat until you see the faintest wisp of smoke coming off the surface. That smoke tells you the pan is hot enough to do what you need it to do.
Set the roast in the pan and then step back. Do not touch it, do not press on it and do not peek underneath it every thirty seconds. The meat will stick to the pan at first — that is normal. When the crust has developed properly, the meat will release on its own. That release is your signal to turn it. You are looking for a deep, dark, mahogany-brown crust on all sides. Not gray. Not tan. Dark brown. That color is the Maillard reaction at work, and it is what separates a roast with flavor from a roast that is just cooked. The Maillard Reaction: How Browning Creates Flavor explains exactly why this step transforms the whole dish.
Figure about three to four minutes per side, and plan for four to five surfaces depending on the shape of your roast. Be patient. Keep the heat high. If the pan starts smoking too heavily, lower it just slightly — but keep it hot.
Building the Braising Base
Transfer the seared roast to your roasting pan. Now look at that pan you seared in. All those dark bits stuck to the bottom — that is flavor. Pour a splash of your broth into the hot searing pan and scrape those bits loose with a wooden spoon or a spatula. Add that liquid to your roasting pan. Nothing gets wasted.
Tuck your onion quarters and smashed garlic cloves around the roast. Lay the thyme sprigs over the top. Drop in the bay leaves. Pour the broth and water into the bottom of the pan. You want the liquid to come up about half an inch — enough to create steam and keep the environment moist, but you are not braising the roast in a pool of liquid. The bottom of the meat should touch the liquid; the top should not.
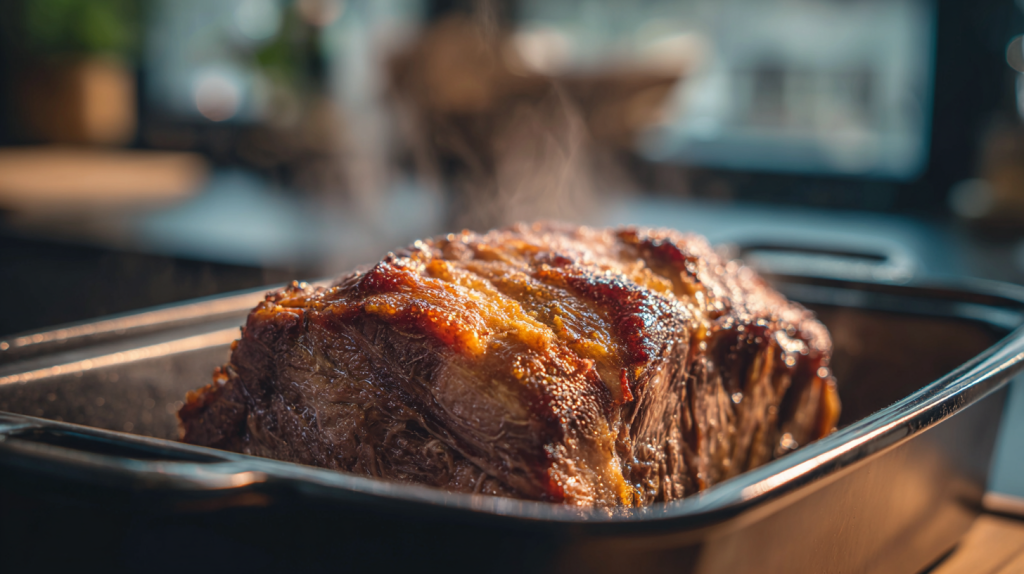
The Long, Low Oven — This Is Where Patience Pays
Slide the covered pan into a 325°F oven. Set a timer for three and a half hours and go do something else. The worst thing you can do to this roast is open the oven door repeatedly. Every time that door opens, the temperature drops, the steam escapes, and the cooking resets. Trust the process.
At three and a half hours, check it. Insert your thermometer into the thickest part, not touching bone if it is bone-in. You are looking for an internal temperature between 195°F and 205°F. I know that sounds high compared to what you have heard about beef, and you are right that most beef is served at a much lower temperature. But cross rib roast is not a steak. It is a braise. The collagen in all that connective tissue does not convert to gelatin until it reaches this higher temperature range. A roast pulled at 145°F will be tough. A roast that has had time at 195 to 205°F will slide apart when you look at it sideways. Trust those numbers. You can also check by pressing a fork into the thickest part — if it goes in and comes out without resistance, like you are pressing into soft butter, the roast is done. If it pulls or resists, cover it back up and give it another thirty minutes. How to Tell When Meat Is Done: Thermometer vs. Visual Cues walks through this in detail if you want to understand the full picture.
The Rest — As Important as the Cooking
Pull the roast from the oven and resist every urge to slice into it immediately. Leave it covered with that foil and let it rest for at least twenty minutes. During that rest, the fibers relax and the juices redistribute back into the meat. Slice into it too soon and those juices run all over your cutting board instead of staying in the roast where they belong.
When you do slice, cut against the grain. Look for the direction the muscle fibers run — they will look like lines in the meat — and cut perpendicular to them. Cutting with the grain gives you long, chewy strands. Cutting against it gives you short, tender bites. It is the same piece of meat, but the direction of the knife makes the difference between good and extraordinary.
Spoon those pan juices over everything. Do not serve this roast dry.
What to Set Beside It at the Table
A cross rib roast is a centerpiece dish, and it wants sides that are honest and hearty enough to hold their own. I always think about what will soak up those pan juices, because those juices are not something you want going to waste.
Mashed potatoes are the obvious answer and they are obvious for good reason. Make them with plenty of butter and a splash of cream, and do not overwork them — you want them creamy and light enough to make a well for those drippings to pool in. Grits made properly are equally wonderful here, and if you have not tried slow-cooked, stone-ground grits alongside a roast like this, you are missing something. The 5 Secrets to Making Perfect, Creamy, Lump-Free Grits will take you through exactly how to do it.
On the vegetable side, collard greens cooked low and slow with a little pot likker from the roasting pan bring the whole plate together in a way that feels like it was always meant to be. Roasted root vegetables — carrots, turnips, potatoes — that you tuck into the roasting pan in the last forty-five minutes of cooking come out soft and caramelized and tasting like the best version of themselves. Simple cornbread alongside handles everything the mashed potatoes cannot.
For a Sunday dinner table, add a pitcher of sweet tea, a bowl of pickled vegetables for brightness, and that is a meal worth sitting down to for a long while.
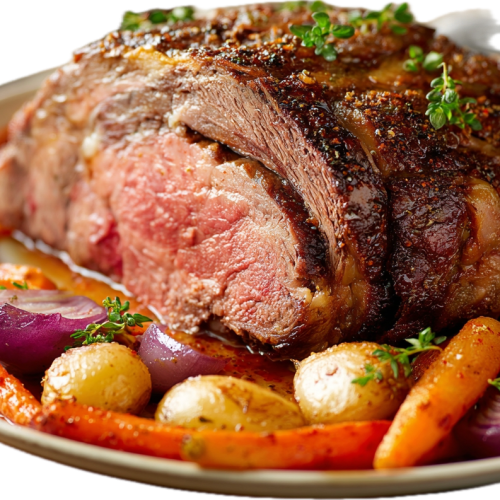
Cross Rib Roast
Equipment
- Large cast iron skillet or heavy oven-safe pan
- Roasting pan with rack
- Meat Thermometer
- Aluminum foil
- Sharp carving knife
Ingredients
The Roast
- 4 lb cross rib roast bone-in or boneless, at room temperature
- 2 tsp kosher salt
- 1 tsp black pepper freshly ground
- 1 tsp garlic powder
- 1 tsp onion powder
- 1 tsp smoked paprika
- 2 tbsp vegetable oil or bacon grease for searing
The Braising Base
- 1 cup beef broth
- 1 cup water
- 1 large onion quartered
- 4 garlic cloves smashed
- 2 sprigs fresh thyme or 1/2 tsp dried
- 2 bay leaves
Instructions
Prep the Roast
- Pull the roast from the refrigerator at least 30 to 45 minutes before cooking. A cold roast going into a hot pan will seize up and cook unevenly. Pat it completely dry with paper towels — moisture is the enemy of a good crust.
- Mix the salt, pepper, garlic powder, onion powder, and smoked paprika in a small bowl. Rub the seasoning all over the roast, pressing it into every surface. Don't be shy — this is the only seasoning the meat is getting on the outside.
Sear the Meat
- Preheat your oven to 325°F. Heat a large cast iron skillet or heavy oven-safe pan over high heat with the oil until it just starts to smoke. Set the roast in the pan and let it sear, undisturbed, for 3 to 4 minutes per side until you have a deep, dark brown crust on all sides. This is where the flavor lives.
Build the Braising Base & Roast
- Transfer the seared roast to a roasting pan. Tuck the onion quarters, smashed garlic, thyme, and bay leaves around the meat. Pour the beef broth and water into the bottom of the pan — you want about a half inch of liquid. Do not pour it over the roast.
- Cover the pan tightly with foil and place it in the preheated oven. Roast for 3.5 to 4 hours, or until the meat is fork-tender and an instant-read thermometer reads 195 to 205°F. At this internal temperature, the tough connective tissue has broken down and the roast will pull apart at the touch.
Rest and Serve
- Remove the roast from the oven and let it rest, still covered with foil, for at least 20 minutes before slicing. This lets the juices redistribute back through the meat. Slice against the grain for the most tender result. Serve with the pan drippings drizzled over the top.
Nutrition
Rate This Recipe
Share This Recipe With The Ones You Love!Variations Worth Making Your Own
Red Wine and Rosemary
Replace half the beef broth with a dry red wine — a Cabernet or a Merlot — and add two sprigs of fresh rosemary to the braising liquid in place of the thyme. The wine adds acidity and depth that brightens the rich beef flavor, and the rosemary gives it an herbal note that feels almost fancy. My oldest daughter makes it this way every Christmas and it has become the dish her family asks for most.
Garlic and Herb Crust
Before the dry rub goes on, spread a paste made from four minced garlic cloves, a tablespoon of softened butter, and a tablespoon of fresh chopped herbs — parsley, thyme, rosemary — directly onto the surface of the roast. Then apply the dry rub over that. The herb paste creates an extra layer of flavor in the crust that perfumes the whole roast as it cooks. It is not fussy and it makes a visible difference in the finished dish.
Tomato and Mushroom Braise
Add a tablespoon of tomato paste to the braising liquid and a handful of dried mushrooms. The tomato paste deepens the color and adds a savory richness that you cannot quite put your finger on but would notice immediately if it were missing. This version produces a darker, more complex pan sauce that is worth making gravy from. If you have never worked with tomato paste as a flavor foundation, Using Umami in Southern Cooking: Tomato Paste, Mushrooms & MSG explains exactly what it does and why it works so well in slow-cooked dishes.
Spicy Smothered Style
After the roast comes out of the oven, make a quick smothering gravy from the pan drippings: whisk together two tablespoons of butter and two tablespoons of flour in a saucepan over medium heat until golden, then add the strained pan juices, a teaspoon of hot sauce, and a half teaspoon of cayenne. Let it simmer until it thickens and pour it back over the sliced roast. This is the version I make when I want to serve it over rice and call it a proper Sunday smothered roast.
Slow Cooker Version
Sear the roast in a hot cast iron pan first — this step is not optional even for the slow cooker version. Transfer to the slow cooker, add the braising liquid and aromatics, cover, and cook on low for eight to ten hours. Do not cook on high. High heat does the same thing to a cross rib roast that rushing does to anything worth doing — it ruins it. The low setting gives the collagen the time it needs to break down properly.
How to Store It, Reheat It, and Get Ahead
A cross rib roast stores beautifully, and most people agree it tastes even better the next day once the flavors have had a chance to settle into each other. Let the roast cool to room temperature before storing — no more than two hours out — then refrigerate in an airtight container with as much of the pan juices as you can fit. It will keep in the refrigerator for three to four days.
To reheat, the best method is low and slow — a reflection of how you cooked it in the first place. Place the sliced meat in a covered baking dish with a few spoonfuls of the reserved juices, cover tightly with foil, and warm it in a 300°F oven for about 20 minutes. The gentle heat keeps it from drying out. If you reheat it in a microwave, do it on a low power setting with a damp paper towel over the top to help hold the moisture in — a full blast of heat will turn a tender roast into something dry and disappointing.
Makes A Great Freezer Dish!
For make-ahead purposes, you can cook this roast a full day in advance and it holds perfectly. In fact, making it the day before removes the stress of timing a roast alongside all your other Sunday cooking. Refrigerate it whole or sliced, then reheat as described above before serving. The flavors genuinely improve overnight, and you will have a relaxed dinner instead of a frantic one.
This roast freezes well too. Portion it into meal-sized freezer bags with some of the pan juices, press out the air, seal tight, and freeze for up to three months. Thaw in the refrigerator overnight and reheat gently. The pan juices protect the meat from freezer burn and keep the texture close to what it was the day you made it.
What to Do with What’s Left Over
Roast Beef Hash
Chop the leftover roast into rough cubes and cook it in a cast iron skillet with diced potatoes, onions, and a little butter until everything is browned and crispy on the edges. Press it down flat in the pan and leave it alone until the bottom forms a crust, then flip it in sections. Crack a few eggs on top and cover the pan until the whites are set. This is the kind of breakfast that makes a person feel genuinely taken care of.
Open-Faced Roast Beef Sandwich
Pile sliced or shredded leftover roast on thick-cut white bread or a toasted split biscuit, then heat the reserved pan drippings in a small saucepan until simmering and pour them right over the top. A little grated horseradish on the side and you have something better than most restaurants charge good money for.
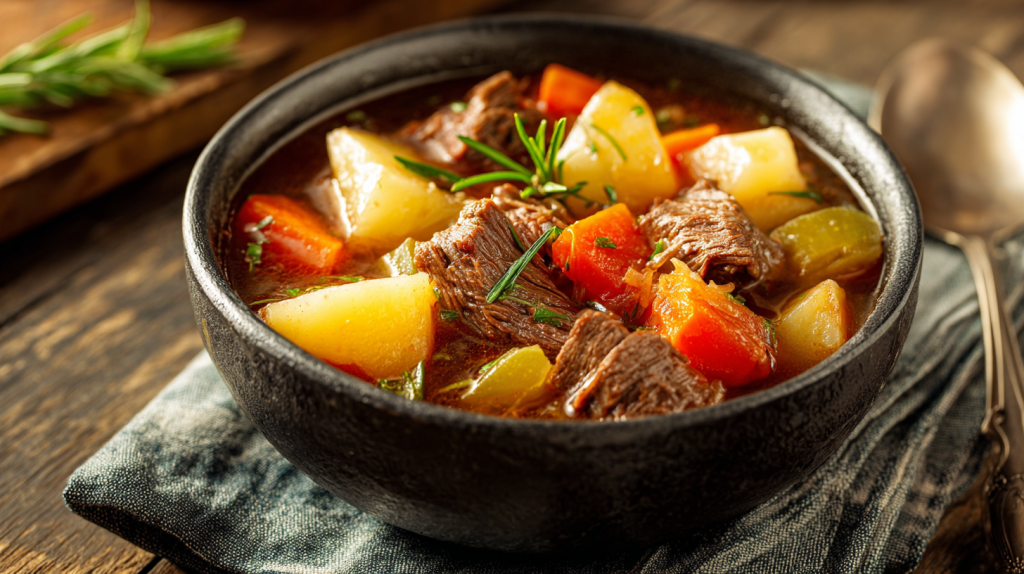
Beef and Vegetable Soup
The leftover meat and every drop of pan juices go directly into a pot with diced potatoes, carrots, celery, canned tomatoes, and enough beef broth to cover it all. Let it simmer for thirty to forty minutes, adjust the seasoning, and you have a soup that tastes like it cooked all day. This is one of the best uses for the roast because the pan juices become the backbone of a broth that could not be bought at any store.
Shredded Beef Tacos
Leftover cross rib roast is already halfway to taco filling. Shred the meat, warm it in a pan with a spoonful of the drippings and a little cumin and chili powder, and serve it on warm tortillas with pickled onions, sour cream, and salsa. It sounds like it has no business being this good, but it is.
Questions People Ask About Cross Rib Roast
What temperature should a cross rib roast reach to be tender?
For a fork-tender cross rib roast, you want an internal temperature between 195°F and 205°F. This is much higher than the safe temperature for eating beef (145°F), but it is the range at which the collagen and connective tissue in this cut break down into gelatin. A roast pulled at 145°F will be safe but tough. Give it the time to reach that higher range and it will be something else entirely.
How long does a cross rib roast take to cook?
At 325°F, plan on roughly 45 minutes to an hour per pound. A four-pound roast typically takes three and a half to four hours. The thermometer will tell you more than the clock — when it reads 195 to 205°F and the meat yields to a fork, it is done. Start checking at the three-hour mark to avoid overcooking, and add time in thirty-minute increments from there if needed.
Do I have to sear the roast before it goes in the oven?
You do not have to, but I strongly recommend it. The sear creates a deep, flavorful crust through the Maillard reaction — that dark browning that you cannot achieve in a low, moist oven. Without it, the roast will be fully cooked and tender, but it will lack the depth of flavor and appealing color that the sear provides. Five to ten minutes of extra work at the beginning pays off for the entire dish.
Can I cook a cross rib roast without liquid?
You can, but results will vary depending on the fat content of your specific roast. The liquid in the pan creates a steamy environment that protects the meat from drying out during the long cook time and helps break down the collagen. Without it, the roast is more likely to dry out in spots, especially on the sides not sitting in fat. I always include at least a cup of liquid for the braising base.
What is the difference between a cross rib roast and a chuck roast?
Both come from the chuck (shoulder) primal of the beef, but the cross rib sits slightly lower and forward on the shoulder than a traditional chuck roast. The cross rib tends to have a slightly finer grain and can be a bit leaner, though both require low, slow cooking to become tender. They are close enough in behavior and flavor that either one can be used in this recipe with identical method and timing.
Why is my cross rib roast tough?
If the roast is tough, it almost always means one of two things: it was not cooked long enough, or it was cooked at too high a temperature. Tough roast means the collagen has not fully broken down yet. The fix is to add more liquid if the pan has gone dry, cover it back up tightly, and return it to the oven for another thirty to sixty minutes. A roast that has gone too far past 205°F and dried out is harder to rescue — use it for soup where the added broth can rehydrate it.
Can I make cross rib roast in a slow cooker?
You can, and it works beautifully — with one non-negotiable step. Sear the roast first in a hot cast iron pan before it goes into the slow cooker. Do not skip this. The sear builds flavor that a slow cooker cannot create on its own. After the sear, add the braising liquid and aromatics, set the slow cooker to low, and cook for eight to ten hours. Do not use the high setting — it rushes the breakdown of collagen and can produce a mealy texture instead of a silky one.
Start It on Sunday and Taste What Patience Can Do
A cross rib roast recipe done with care is the kind of meal that makes people stop and notice. Not because it is complicated — it is one of the simplest dishes in the repertoire — but because time and heat do something to an honest piece of beef that no amount of technique or seasoning can shortcut. You let it go low and slow, you give it the steam it needs, you resist the urge to fuss with it, and it rewards every bit of that patience when it comes out of the oven.
Make it once and you will understand why this was a Sunday dinner staple for so many generations. Make it again and you will start doing what all good cooks eventually do — making it your own, adapting it to the herbs in your garden and the tastes of the people at your table. I hope it serves your family as well as it has served mine. Come back and let me know how it turned out.