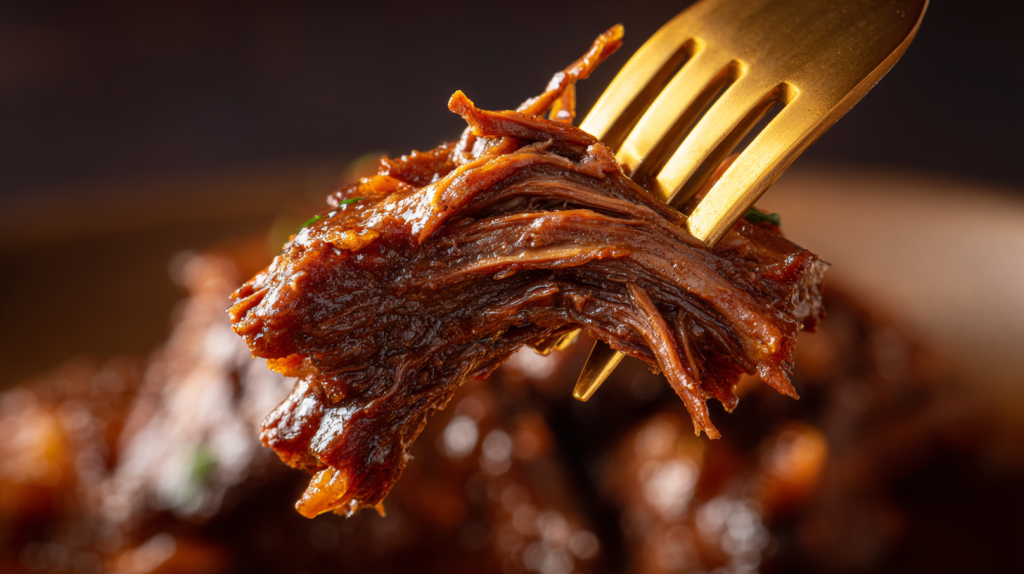
This Dutch Oven Pot Roast recipe with gravy is the best you’ll ever find!
If you have ever pulled a tough, dry piece of meat out of the oven and wondered where it all went wrong, you are in the right place because I am going to show you exactly how to achieve that melt-in-your-mouth texture every single time. This dish is perfect alongside a slice of Skillet Cornbread or a scoop of Creamy Mashed Potatoes.
We have all been there—staring at a beautiful Sunday dinner that just didn’t turn out quite right. Maybe the meat was chewy, or the vegetables turned to mush before the beef was done. It is frustrating to spend hours cooking only to feel disappointed when you sit down to eat.
But I promise you, with a few simple adjustments to your technique and a little bit of patience, you will master this classic. My method uses a low-and-slow braise that transforms humble ingredients into a Dutch Oven Pot Roast so tender you won’t even need a knife.
Why This Dutch Oven Pot Roast Works
When we talk about Southern comfort food, we are talking about dishes that hug you from the inside out. This pot roast is the definition of that feeling. It works because we aren’t rushing the process. Many recipes try to speed things up with high heat, but the true soul of a pot roast lies in the breakdown of collagen. We are using a chuck roast, which is a hardworking muscle. To turn that tough connective tissue into succulent gelatin, we need time and gentle, consistent heat.
By setting our oven to a low 285°F, we create an environment where the meat relaxes rather than seizing up, ensuring every bite is moist and flavorful.
The Dutch oven itself is the unsung hero here. Its heavy cast-iron construction retains heat beautifully and radiates it evenly, eliminating hot spots that could scorch your sauce. The heavy lid traps moisture, creating a self-basting cycle where the steam rises, condenses, and rains back down on the meat. This isn’t just cooking; it is a slow infusion of flavor. The wine, the herbs, and the beef juices marry together in that pot, creating a braising liquid that is rich, dark, and complex.
Growing up, the smell of a roast in the oven was the signal that everything was right in the world. It meant the family was gathering, and there was nowhere else we needed to be. That is the magic I want you to experience. It is not just about the science of emulsifying fat and liquid to make a gravy; it is about the memories you build while the house fills with the scent of thyme and rosemary.
The Key Ingredients: Secrets to Flavor
The beauty of this dish lies in its simplicity. We aren’t using fancy, hard-to-find items; we are using humble ingredients and treating them with respect. However, the quality and preparation of these ingredients make all the difference in the final flavor profile.
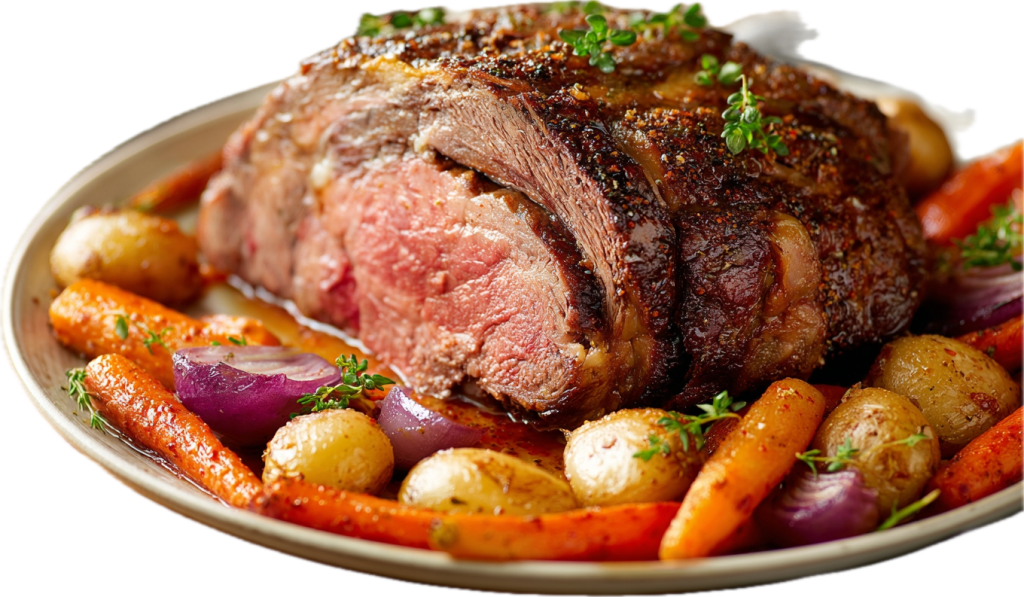
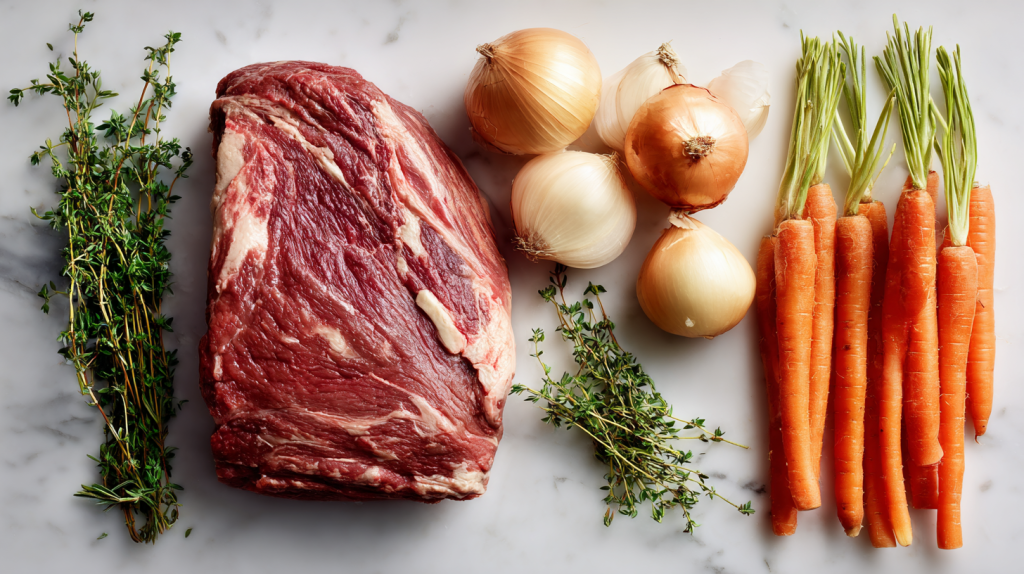
First and foremost is the beef. You want a boneless beef chuck roast. I always look for a piece that has good marbling—those little flecks of white fat running through the red meat. As the roast cooks, that fat renders down and bastes the meat from the inside out. If you choose a lean cut like a round roast, you will end up with dry meat. Chuck is king here.
Then there is the liquid gold: the braising liquid. We use a combination of beef broth and red wine. The wine adds acidity, which helps tenderize the meat and cuts through the richness of the fat. You don’t need an expensive bottle—a simple Cabernet Sauvignon or Merlot works wonders. If you prefer not to cook with alcohol, you can substitute it, but the wine truly adds a depth that is hard to replicate. And let’s not forget the aromatics. Fresh thyme and rosemary are non-negotiable for me. Dried herbs are fine in a pinch, but fresh sprigs release oils that perfume the entire dish in a way dried just can’t match.
Insider Secret: Don’t skip the tomato paste! It might seem like a small amount, but when you sauté it with the onions and garlic, it caramelizes and adds a “umami” depth—a savory richness that makes the gravy taste like it has been simmering for days.
Quick Substitution Guide:
- Red Wine: Substitute with additional beef broth mixed with 1 tablespoon of balsamic vinegar or Worcestershire sauce for acidity.
- Pearl Onions: If you want a fancier presentation, swap sliced yellow onions for whole peeled pearl onions.
- Potatoes: Baby yellow potatoes are best because their skins are thin and they hold their shape. Russets work but can break down more easily in the sauce.
How to Make Dutch Oven Pot Roast: My Step-by-Step Method
Making a Dutch Oven Pot Roast is a labor of love, but it is not difficult. It is about layering flavors one by one. I want you to pay attention to your senses as you cook—listen to the sizzle, smell the changes in the aromatics, and watch the colors deepen.
Preparing the Meat and the Sear
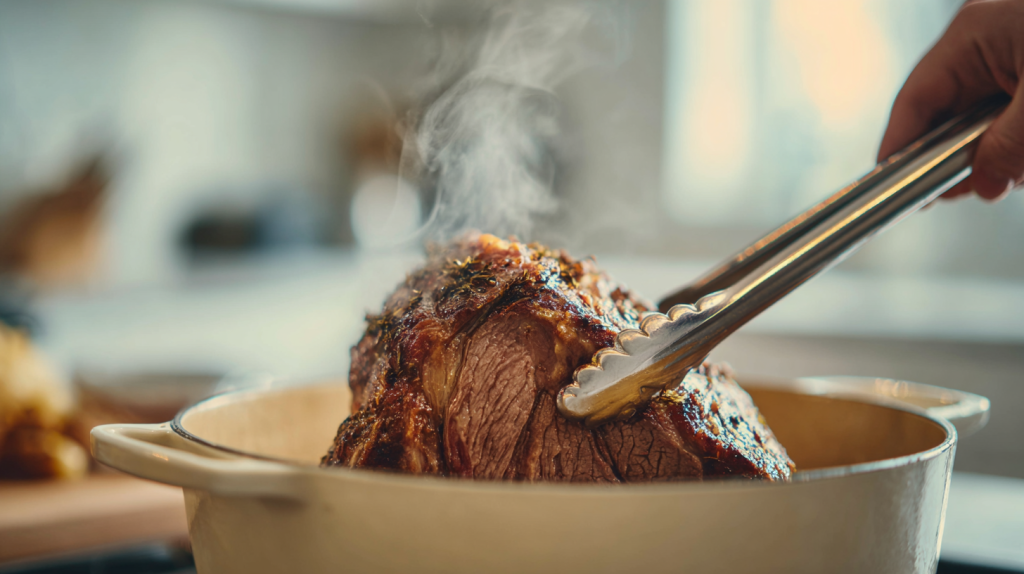
We start by dredging the roast in seasoned flour. This does two things: it helps create a gorgeous crust on the meat, and that little bit of flour will thicken our sauce later on. Make sure your pot is hot before the meat goes in. You want to hear a confident sizzle, not a weak hiss. We are looking for a deep, mahogany brown crust here. Do not rush this. If you try to flip the meat and it sticks, it is telling you it isn’t ready. Let it release naturally. This caramelization is called the Maillard reaction, and it is the foundation of your flavor.
Building the Braising Liquid
Once the meat is set aside, we don’t wash the pot! Those dark bits stuck to the bottom are pure flavor—we call that “fond.” When you add your onions, the moisture will help lift some of that up. You’ll know the onions are ready when they turn translucent and sweet. Then comes the garlic and tomato paste. You want to cook the garlic just until it’s fragrant—about a minute. If you brown it too much, it turns bitter. When you pour in the wine to deglaze, use your wooden spoon to scrape the bottom of the pot vigorously. You should see the liquid turn a rich brown color as it incorporates that fond.
The Slow Braise
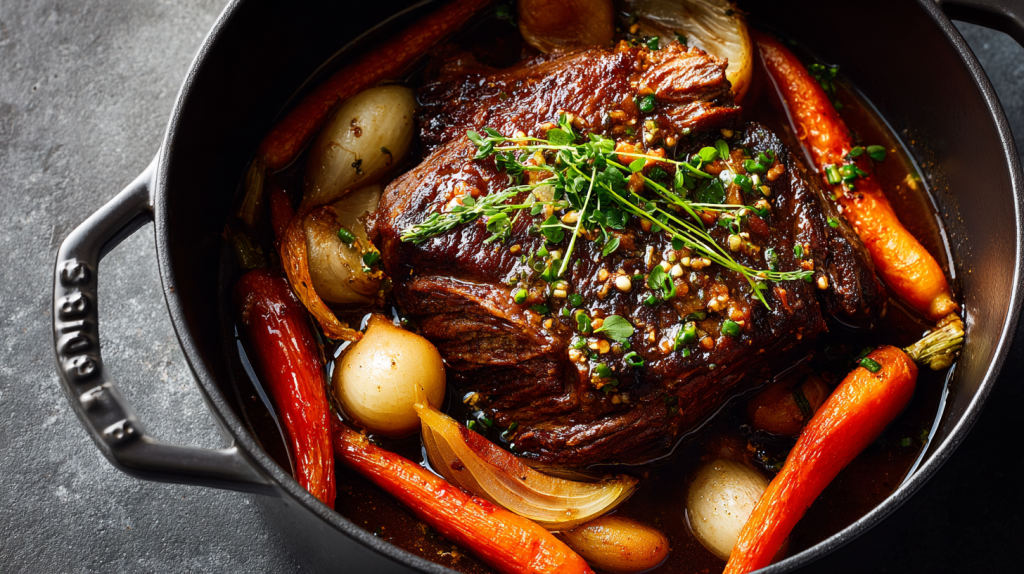
Now, we return the roast to the pot and surround it with our liquids and herbs. The liquid should come about halfway up the beef. We aren’t boiling the meat; we are braising it. Cover it tight and slide it into the oven. This is where the patience comes in. We cook it undisturbed for two hours. No peeking! lifting the lid releases all that precious heat and steam.
Adding the Vegetables
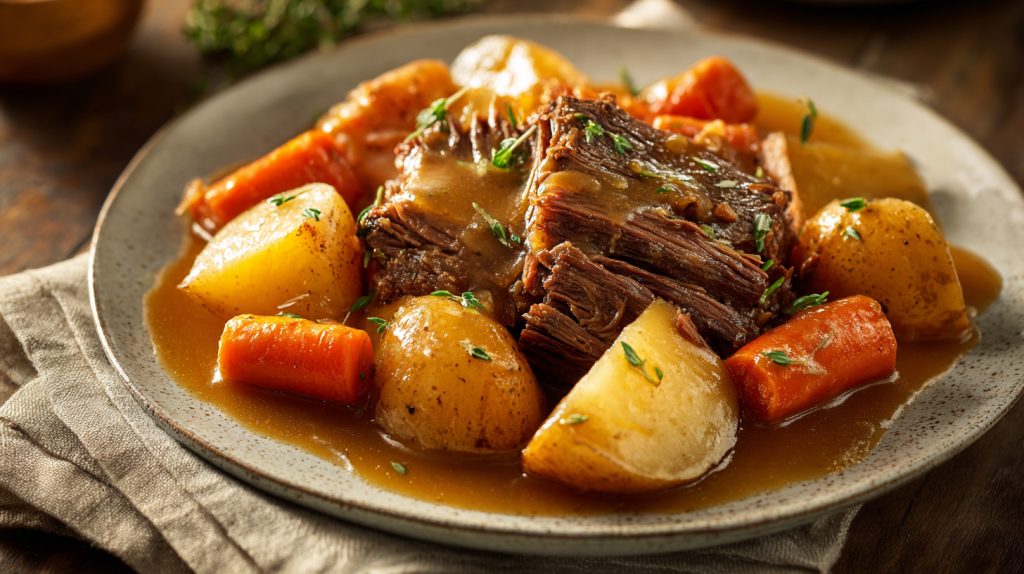
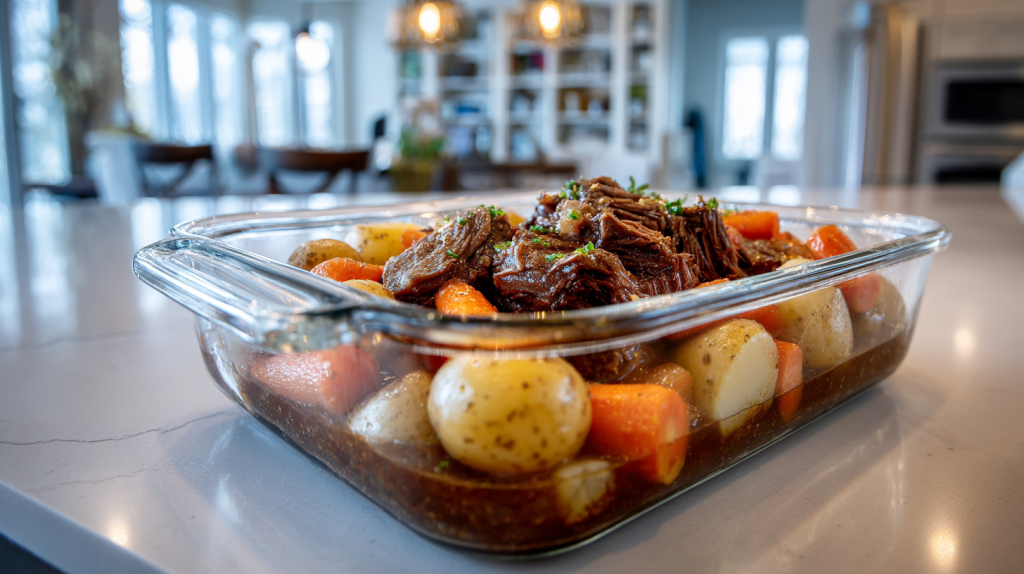
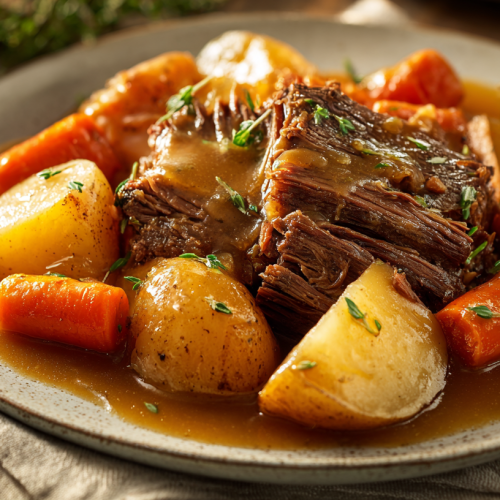
Timing is everything with the vegetables. If you put the potatoes and carrots in at the beginning, they would be mush by the time the beef is tender. We add them in the last hour of cooking. This ensures they soak up the gravy but still have a pleasant bite. When you pull the pot out to add them, be careful—that cast iron holds heat like you wouldn’t believe. Nestle the veggies into the liquid, cover it back up, and let it finish. You will know it is done when the meat offers absolutely no resistance to a fork. It should essentially collapse.
Pro-Tip: If your sauce looks a little too thin after the roast is done, simply remove the meat and veggies to a platter, place the Dutch oven on the stove over medium heat, and simmer the liquid for 5-10 minutes to reduce it. It concentrates the flavor even more!
Serving Suggestions & Perfect Pairings
When you bring this heavy pot to the table and lift the lid, the aroma alone is enough to gather the family. Dutch Oven Pot Roast is a rich, hearty meal, so I like to pair it with sides that can stand up to that intensity or cut through it with freshness.
Since we already have potatoes in the pot, you technically have a complete meal. However, I am a firm believer that you can never have too many potatoes. If you skipped the potatoes in the roast, serving this over a bed of Creamy Garlic Mashed Potatoes is heavenly. The gravy acts as a sauce for the mash. For something green, I love serving Sautéed Green Beans with Bacon or a crisp, acidic salad with a vinaigrette. The acid helps cleanse the palate between bites of the rich beef. And of course, you need something to sop up that gravy—a basket of warm yeast rolls or crusty French bread is essential.
Delicious Variations to Try
Cooking is personal, and once you have mastered the basic technique, you can make this recipe your own. Here are a few twists that my family loves.
The Balsamic & Mushroom Twist: If you love earthy flavors, this one is for you. Add 8 ounces of cremini mushrooms when you add the carrots. Swap half the red wine for balsamic vinegar. The balsamic reduces down to a sweet, sticky glaze that coats the beef and mushrooms beautifully. It feels a little more elegant and is perfect for a dinner party.
The Spicy Cajun Kick: For a variation with a little heat, add a tablespoon of Cajun seasoning to your flour mixture before dredging the beef. I also like to toss in a chopped bell pepper with the onions. The heat plays nicely against the rich beef fat, waking up your taste buds. My husband loves this version on a cold winter night.
The Beer Braise: Instead of red wine, try using a dark stout or porter beer. The roasted malt flavors in the beer pair incredibly well with beef. It gives the gravy a deep, almost chocolatey richness that is very distinct. This version is fantastic served with egg noodles instead of potatoes.
Storage, Reheating & Make-Ahead Tips
I will let you in on a little secret: this roast might actually be better the next day. As it sits in the fridge, the flavors have time to meld and deepen. This makes it an incredible make-ahead meal for holidays or busy weeks.
Storage: Let the roast cool completely before transferring it to an airtight container. It will keep in the refrigerator for up to 3-4 days. You can also freeze the meat and the gravy for up to 3 months. However, I recommend eating the vegetables fresh or refrigerating them only, as potatoes tend to get grainy and mealy when frozen and thawed.
Reheating: Please, I beg of you, do not microwave this if you can avoid it! The microwave will zap the moisture right out of the meat, undoing all your hard work. Place the leftovers in a Dutch oven or covered skillet on the stove over medium-low heat. Add a splash of broth or water if the gravy has thickened too much (it will turn into a gelatin in the fridge—that is a good sign!). Let it warm through gently for about 15-20 minutes.
Insider Secret: If you are making this ahead for a party, undercook the vegetables slightly (by about 10 minutes). When you reheat the whole pot on the stove the next day, the vegetables will finish cooking perfectly without turning to mush.
Leftover Magic: Creative Ways to Use This Pot Roast
If you are lucky enough to have leftovers, you have the start of a whole new meal. Don’t just reheat the same plate; transform it!
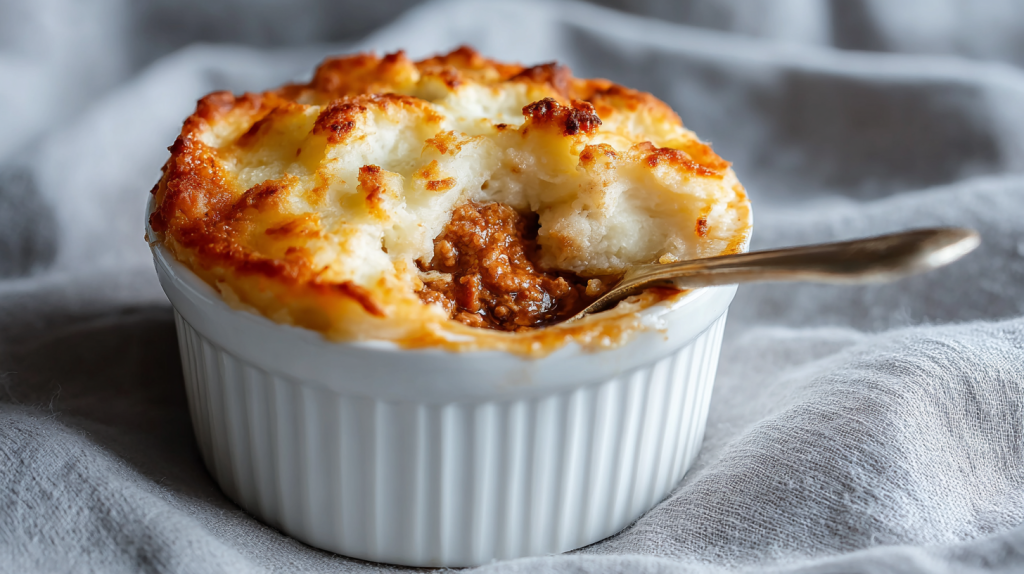
Pot Roast Shepherd’s Pie: This is my favorite way to use up everything. Chop the leftover meat and veggies into bite-sized pieces. Toss them in a baking dish with the leftover gravy. Top the whole thing with mashed potatoes and bake at 400°F until the potatoes are golden and the filling is bubbly. It is a completely new dish that tastes like it took hours to make.
Beef Barley Soup: Take the leftover gravy and meat (shredded finely) and add them to a pot with 4 cups of beef broth. Bring it to a boil and add ½ cup of pearl barley. Simmer until the barley is tender. The rich gravy creates a broth that is incredibly satisfying. It is perfect for lunch later in the week.
Troubleshooting: Your Questions Answered
Why is my pot roast tough?
If your roast is tough, it simply hasn’t cooked long enough. It sounds counterintuitive, but you need to cook it longer to make it tender. The collagen needs time to break down. Put the lid back on and give it another 30-45 minutes. Trust the process; it will get there.
Can I make this in a slow cooker?
Absolutely. Follow the instructions for searing the meat and sautéing the aromatics in a skillet first—do not skip this flavor-building step! Then, transfer everything to your slow cooker. Cook on LOW for 8-9 hours or HIGH for 4-5 hours.
What if I don’t have a Dutch oven?
While a Dutch oven is ideal for heat retention, you can use any heavy-bottomed, oven-safe pot with a tight-fitting lid. If your pot doesn’t have a lid, you can cover it tightly with two layers of heavy-duty aluminum foil. The goal is to trap the steam.
Why is my gravy thin?
The flour from the dredging step usually thickens the sauce nicely. However, if you want it thicker, mix 1 tablespoon of cornstarch with 1 tablespoon of cold water (a slurry) and stir it into the boiling liquid on the stove after you remove the meat. It will thicken up instantly.
Is this recipe gluten-free?
To make this recipe gluten-free, simply swap the all-purpose flour in the dredging step for a gluten-free flour blend or cornstarch. Also, double-check your Worcestershire sauce and beef broth labels to ensure they are certified gluten-free.
Can I use a different cut of meat?
You can use a brisket or a bottom round roast, but they are leaner and may not be quite as succulent as the chuck roast. If you use a leaner cut, be very careful not to overcook it, as it can dry out faster since it lacks the internal fat to baste itself.
There is a reason that pot roast has remained a staple in kitchens for generations. It is a dish that rewards patience with incredible flavor and tenderness. It is the culinary equivalent of a warm hug. Whether you are cooking for a special occasion or just want to treat your family to a hearty meal on a Tuesday, this recipe will not let you down.
Remember, the secret is in the sear and the low-and-slow braise. I can’t wait to hear how this turns out in your kitchen! When you make it, let me know if you stuck to the classic or tried one of the variations. Happy cooking!
Best Dutch Oven Pot Roast Recipe (Fork-Tender & Flavorful)
Equipment
- 7 to 8 quart Dutch oven with tight-fitting lid
- Tongs
- Wooden Spoon
Ingredients
- 3 pounds boneless beef chuck roast
- 1/3 cup all-purpose flour for dredging
- 1 1/2 teaspoons kosher salt plus more to taste
- 1 teaspoon ground black pepper plus more to taste
- 2 tablespoons olive oil
- 1 tablespoon butter
- 2 large yellow onions peeled and thinly sliced
- 6 cloves garlic minced
- 2 tablespoons tomato paste
- 5 carrots peeled and cut into 2-inch pieces (or 1 pound baby carrots)
- 4 large ribs celery cut into 1/2-inch crescents
- 3 cups beef broth divided, plus more as needed
- 1 cup red wine can substitute with additional beef broth
- 2 teaspoons Worcestershire sauce
- 4 sprigs fresh thyme or 1/2 teaspoon dried
- 2 sprigs fresh rosemary or 1/2 teaspoon dried
- 2 bay leaves dried
- 1 1/2 pounds baby yellow potatoes or 3 medium Russet potatoes, peeled and cut into eighths
- fresh Italian parsley chopped, for garnish (optional)
Instructions
- Position your oven rack in the lower third and preheat to 285°F. Combine the flour with a generous pinch of salt and pepper on a large plate or sheet of waxed paper. Thoroughly pat the chuck roast dry with paper towels on all surfaces, then dredge it completely in the seasoned flour mixture, coating every side well.
- Place your Dutch oven over medium-high heat and add the butter and olive oil. Once the fats are shimmering and hot (but not smoking), carefully place the roast in the pot. Sear without moving for 5-6 minutes until a deep golden-brown crust forms on the bottom. Flip and sear the opposite side for another 5-6 minutes. Transfer the beautifully browned roast to a plate and set aside.
- Lower the heat to medium. Pour 1 cup of beef broth into the hot Dutch oven and use a wooden spoon to vigorously scrape all those gorgeous browned bits from the bottom and sides of the pot—this is where incredible flavor lives.
- Add the sliced onions to the pot and sauté for about 3-4 minutes, stirring occasionally, until they begin to soften and turn translucent. Stir in the minced garlic and cook for 1 minute until wonderfully fragrant. Add the tomato paste and stir it into the onions for about 30 seconds.
- Add the carrots and celery to the pot, stirring to combine with the aromatics. Cook for another 2-3 minutes, allowing the vegetables to begin softening.
- Pour in the red wine (or additional broth) and quickly deglaze the pot again, scraping up any remaining browned bits. Add the remaining 2 cups of beef broth, Worcestershire sauce, fresh thyme sprigs, rosemary sprigs, and bay leaves. Stir everything together and bring the liquid to a gentle simmer.
- Nestle the seared roast back into the pot on top of the vegetables, along with any accumulated juices from the plate. The liquid should come about halfway up the sides of the meat—if it doesn't, add a bit more broth. Season the top of the roast with another light sprinkle of salt and pepper.
- Cover the Dutch oven tightly with its lid and carefully transfer it to the preheated oven. Braise undisturbed for 2 hours, allowing the roast to become tender in that low, gentle heat.
- After 2 hours, carefully remove the Dutch oven from the oven (use oven mitts—it's hot!). Add the potatoes, gently pushing them down into the braising liquid around the roast. Check the seasoning and adjust with more salt and pepper if needed. Cover again and return to the oven.
- Continue cooking for another 60-75 minutes, until the potatoes are fork-tender and the meat is so tender it practically falls apart when you touch it with a fork. The internal temperature should reach 195-205°F for that perfect pull-apart texture.
- Remove the Dutch oven from the oven and let it rest for 5-10 minutes. Discard the herb sprigs and bay leaves. If desired, transfer everything to a large serving platter, or simply serve straight from the Dutch oven. Garnish with freshly chopped parsley if you like, and ladle that rich, flavorful braising liquid over each serving.
Nutrition
Rate This Recipe
Share This Recipe With The Ones You Love!