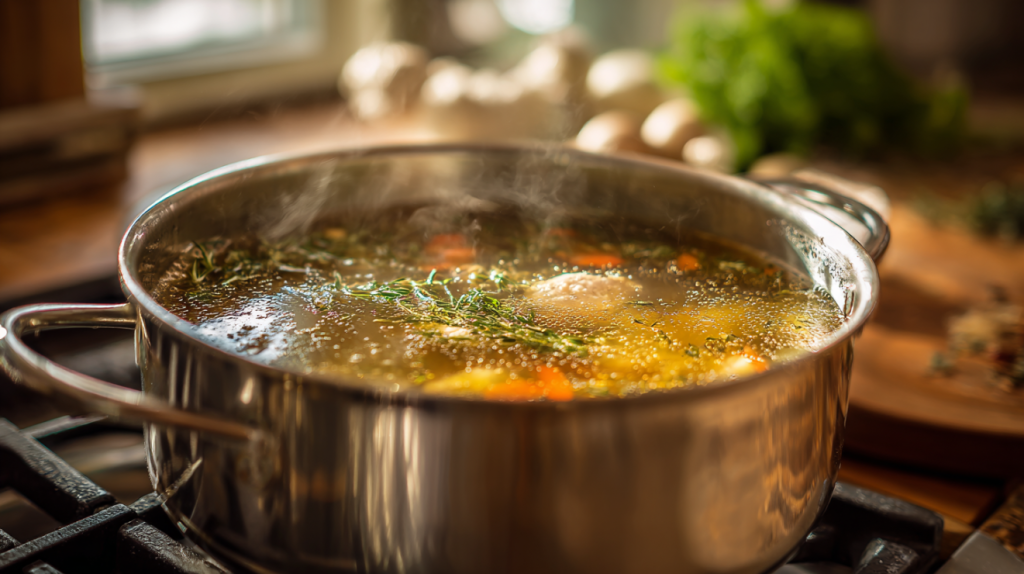
There is nothing in the kitchen more useful, more comforting, or more taken for granted than a pot of real chicken broth made from scratch. Once you make it this way — the slow way, the right way — you will never go back to anything that comes out of a can or a carton.
This is the recipe I am going to walk you through today, and I promise you it is simpler than you think. A good chicken broth is the backbone of Southern cooking. It is what makes your soup taste like something your grandmother made. Delicious chicken broth will turn a plain pot of rice into something worth hollering about. It is the difference between a gravy that tastes flat and one that makes people go back for seconds.
If you have ever wondered why your homemade broth turns out thin and pale, or why it never tastes as good as what you remember from growing up, this is the article that fixes that. I have been making chicken broth on this stove for more years than I care to count, and everything I have learned is right here. No shortcuts, no gimmicks — just the real thing, the way it ought to be done.
The Soul of a Good Chicken Broth
Every kitchen I grew up around had a pot of broth going at some point during the week. My mother kept it going on the back of the stove like it was part of the family. It was not a recipe anybody wrote down because it was not something you learned from a book. You learned it by watching, by smelling, by being there when the kitchen started to smell like home.
A good chicken broth is more than just flavored water. It is the foundation that holds together the best cooking you will ever do. Soup, dumplings, gravy, rice, greens — they all start here. When the broth is right, everything built on top of it is right too. When the broth is weak, you spend the rest of the meal trying to make up for it.
This version is the one I have made my whole life. It is the one my mother made and her mother before her. There is no mystery to it, but there is patience. That is really the only ingredient most people leave out.
What sets a real homemade chicken broth apart from anything store-bought is body. When you simmer a whole chicken low and slow for hours, you pull out gelatin from the bones and joints. That gelatin is what makes the broth feel rich on your tongue and gives it that silky quality you just cannot get from a box. When your broth sets up like jelly in the refrigerator, that is how you know you did it right.
What Makes This Chicken Broth Recipe Worth Making
The ingredients in a good chicken broth are simple, but every single one earns its place in the pot. Understanding what each one does and why it matters is the difference between broth that tastes like something and broth that tastes like nothing.
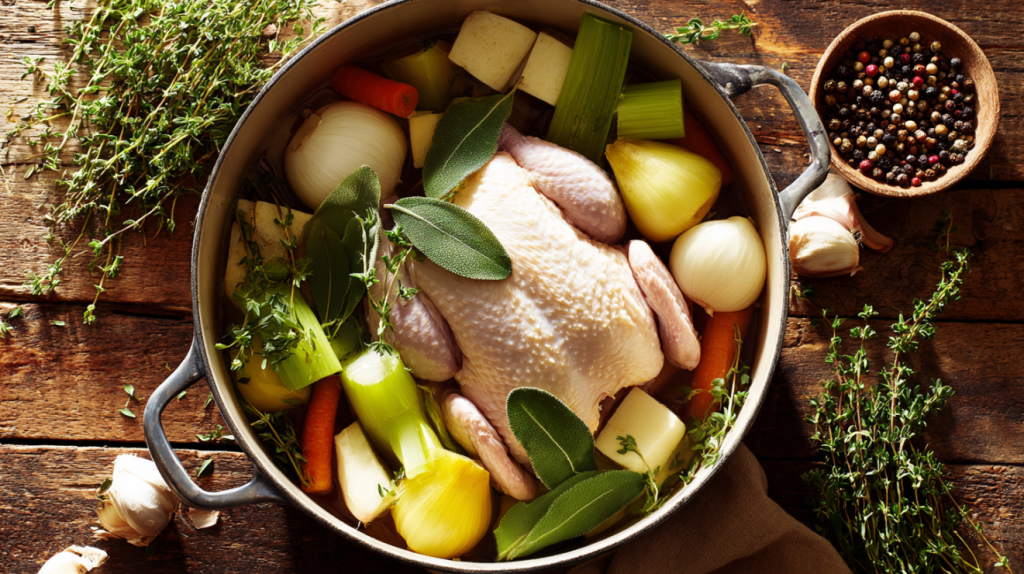
The chicken itself is the heart of everything. I use a whole bird, about four pounds, because you get the best of both worlds — the meat gives flavor and the bones give body. If you can get a chicken with the back still in it, even better. Backs, necks, and wing tips are where the gelatin lives. After the broth is done, you pick the meat off and use it for soup, chicken salad, or sandwiches. Nothing gets wasted in this kitchen.
Yellow onions go in quartered with the skin still on. That papery brown skin is what gives your broth that deep golden color everybody loves. The celery goes in with the leaves attached — those leaves carry more flavor than most people realize. And the carrots add a gentle, natural sweetness that rounds out the whole pot. I do not peel the carrots either. Just give them a good scrub and cut them up. Everything is getting strained out later anyway.
The aromatics — bay leaves, whole peppercorns, fresh thyme, and parsley stems — are what give the broth depth without making it taste like any one thing. I use parsley stems instead of leaves because the stems carry a stronger, cleaner flavor that holds up over hours of simmering. The leaves tend to turn bitter if they cook too long.
For salt, I start with a tablespoon of kosher salt and adjust at the end. Here is why: as the broth simmers and reduces, the salt concentrates. If you salt it to taste at the beginning, it can end up too salty by the time it is done. Better to hold back and add more once you know what you are working with.
Quick Substitution Guide:
- No whole chicken — use 4 pounds of bone-in chicken pieces (thighs, backs, necks, and wings work best; breasts alone make a thin broth)
- No fresh thyme — use half a teaspoon of dried thyme, but fresh is always better here
- No apple cider vinegar — white vinegar or a squeeze of lemon juice does the same job
- No fresh parsley — skip it rather than use dried; dried parsley adds nothing useful to a broth

How to Make Chicken Broth That Tastes Like It Came from Your Grandmother’s Kitchen
The recipe card gives you the bones of this recipe. This is where I stand beside you and walk you through every step the way it actually happens at the stove — what to watch for, what to listen for, and how to know when things are right.
Setting Up the Pot
Start by placing the whole chicken in the center of your biggest stockpot. I use an 8-quart pot, but bigger is fine. You want room. Tuck the onion quarters, celery, carrots, and smashed garlic all around the bird. Drop in your bay leaves, peppercorns, thyme, and parsley stems. Pour the vinegar right over the top.
Now add cold water — and I mean cold. Do not use warm or hot water from the tap. Cold water draws out proteins and gelatin slowly, which gives you a cleaner, richer broth. Hot water seals things up too fast. You want the water about two inches above the chicken. If the bird is poking out a little at the top, that is fine. It will settle as things heat up.
Sprinkle the salt over the top and set the pot on the burner over medium-high heat. Then you wait.
Bringing It Up and Skimming
As the pot heats, you are going to start seeing a grayish foam rising to the surface. This is just proteins coming out of the meat and bones. It is not harmful, but if you leave it in there, your broth will be cloudy and have a slightly off flavor. This is the one part where you need to pay attention.
Stand near the pot for the first 30 minutes. As the foam rises, skim it off with a ladle or a big spoon and discard it. You will see the most foam right before the pot comes to a boil and in the few minutes after you turn it down. Once you have skimmed for about 20 to 30 minutes and the foam slows down, you are through the worst of it.
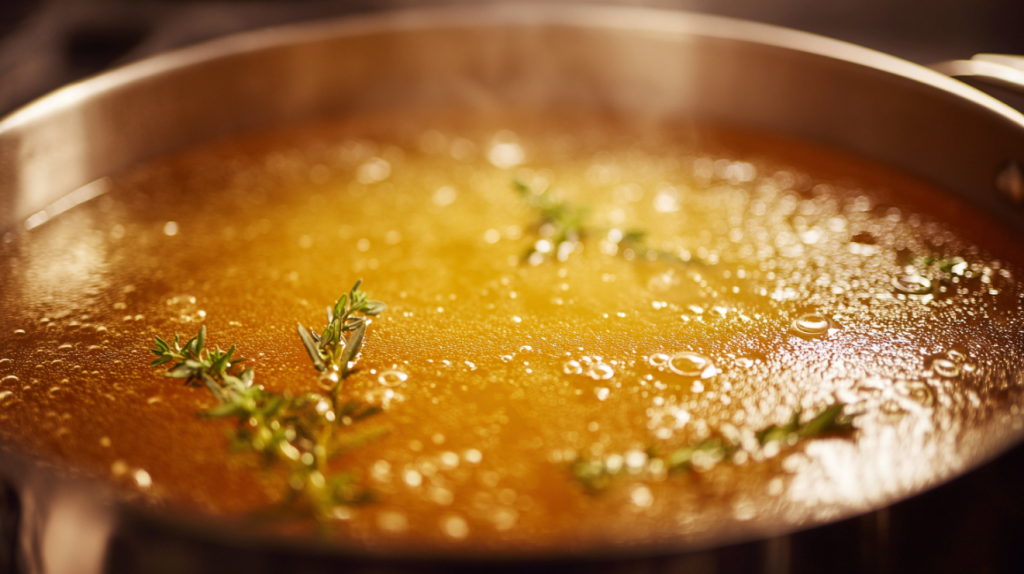
When the water hits a full rolling boil — big bubbles breaking the surface — turn the heat down right away. You want the gentlest simmer you can manage. I am talking about a bubble breaking the surface every few seconds, no more. If you can see the surface trembling but barely moving, that is perfect. A hard boil will make your broth cloudy and greasy because it emulsifies the fat into the liquid instead of letting it float on top where you can remove it later.
Michigan State University Extension offers a helpful guide on safe chicken broth preparation and canning for anyone looking to preserve their broth for longer storage.
The Long, Slow Simmer
Once you have the heat right and the skimming done, this is where patience takes over. You are going to let this pot sit on that low simmer for 3 to 4 hours. Do not stir it, do not poke at it & do not lift the chicken out to check on it. Just let it be.
Walk through the kitchen every now and then and check that the simmer is still gentle. If it has crept up to a boil, turn it down a notch. If the water level has dropped too much and the chicken is exposed, you can add a little more cold water — but only if you need to.
Here is what you should notice as the hours go on. Around the one-hour mark, your kitchen is going to start smelling like the best thing in the world. That warm, savory, herby smell that just wraps around you — that is your sign things are working. By hour two, the chicken will look like it is falling apart, and the vegetables will be soft and spent. By hour three, the liquid should have reduced by about a third and turned a deep, rich gold. That color tells you there is real flavor in there.
Straining and Finishing
When the broth has simmered for at least three hours and the color and smell are right, it is time to strain. Carefully lift the chicken out with two large spoons or tongs and set it on a cutting board or in a bowl. Be gentle — that bird is going to be falling apart. Set it aside to cool so you can pick the meat off later.
Set a fine mesh strainer over your biggest heat-safe bowl. If you want crystal-clear broth, line the strainer with a piece of cheesecloth or even a clean cotton kitchen towel. Ladle the broth through the strainer. Do not press on the vegetables or squeeze them — just let gravity do the work. Pressing will push cloudy bits through and muddy up your beautiful broth.
Taste it now. This is when you adjust the salt. Add a little at a time, stir, taste. You want it to taste full and savory but not salty. Remember, if you are going to cook with this broth later and reduce it into a soup or gravy, it will concentrate further. Keep that in mind.
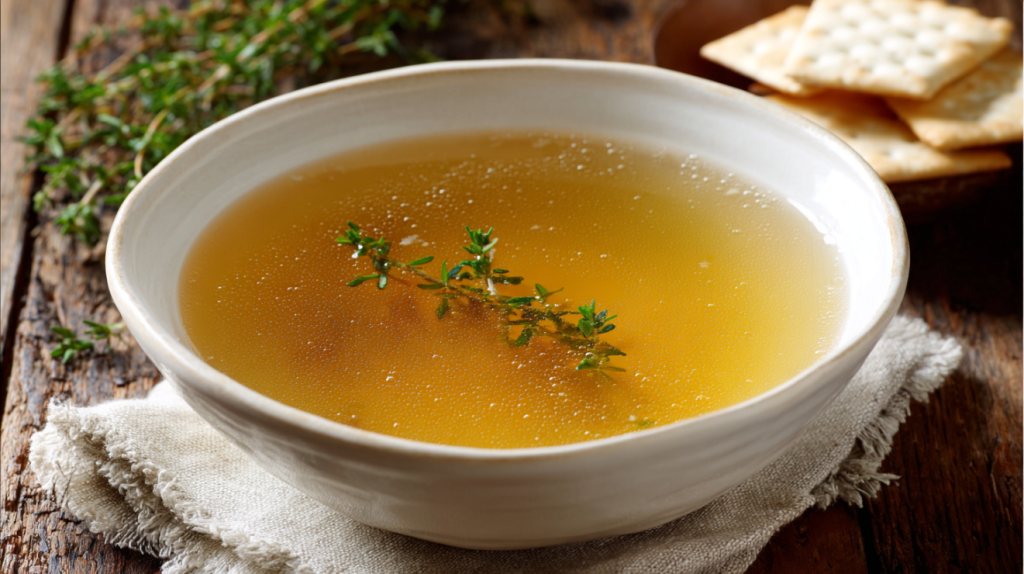
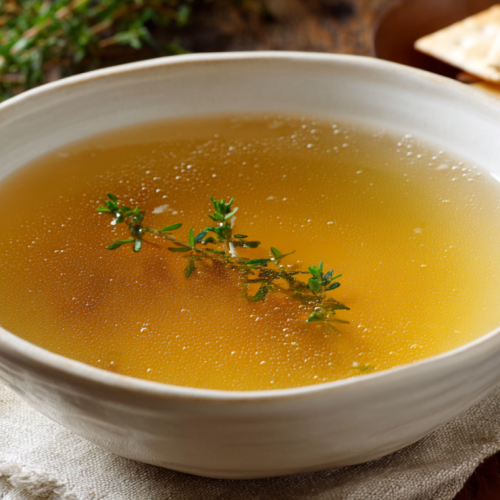
Let the broth cool to room temperature on the counter, then put it in the refrigerator. Overnight, a layer of fat will rise to the top and harden. You can peel that right off in one piece. Some people save that chicken fat for cooking — it is wonderful for sauteing vegetables or making a roux. Whatever you do not want, just discard it. What you have underneath is pure, golden, silky chicken broth that is ready for anything.
What to Serve with Your Chicken Broth
Chicken broth is a starting point, not a destination, and that is what makes it so valuable. On a cold evening, there is nothing better than a bowl of this broth on its own with some saltine crackers. It is the first thing I reach for when someone in the family is feeling under the weather, and it always seems to help.
This broth is the foundation for chicken and dumplings, and once you taste dumplings floating in real homemade broth, you will understand why people get so particular about it. It is also what makes a proper chicken noodle soup taste the way it should — rich and warming, not thin and forgettable.
For Sunday dinner, use it as the base for your gravy. For weeknight suppers, cook your rice in it instead of water — the difference is remarkable. Any time a recipe calls for broth or stock, this is what you want in your refrigerator or freezer, ready to go.
Variations Worth Trying
Roasted Chicken Broth
Before anything goes in the pot, roast the chicken pieces and vegetables in the oven at 425 degrees for about 30 to 40 minutes until they are deep brown and caramelized. Then transfer everything to your stockpot and proceed as usual. The roasting adds a richer, deeper flavor with almost a toasty quality to it. My oldest son prefers this version for his French onion soup, and I cannot argue with him on that.
Herb-Heavy Garden Broth
If your herb garden is going wild in the summer, throw in whatever you have — rosemary, sage, oregano, dill. Just be careful with rosemary and sage because they are strong. A sprig or two is plenty. This version is beautiful for cooking summer vegetables or as the base for a lighter soup. I make this one when everything in the garden is coming in at once.
Ginger and Garlic Broth
Add a two-inch piece of fresh ginger, sliced, and double the garlic. Leave out the thyme and parsley. This makes a broth with some warmth to it that is wonderful for Asian-inspired soups, wonton soup, or just sipping when you feel a cold coming on. My granddaughter started asking for this version a few years back, and now I always keep some in the freezer for her.
Bone Broth (Extended Simmer)
After you remove the meat at the 3-hour mark, put the bones back in the pot with fresh water and keep simmering for another 8 to 12 hours. This pulls out every bit of gelatin and minerals from the bones. The result is incredibly thick and rich — it will be solid as gelatin when it cools. This is the one I make when I want something truly restorative. It takes time, but the bones do all the work.
Keeping Your Chicken Broth Fresh and Ready
In the refrigerator, your chicken broth will keep for four to five days in a sealed container. I use wide-mouth mason jars because they are easy to pour from and you can see exactly how much you have left. Leave about an inch of space at the top if you plan to freeze them, because the liquid expands as it freezes and will crack a jar that is too full. I learned that the hard way more than once.
For freezing, you have options. Mason jars work if you leave enough headspace. Ice cube trays are perfect for when you just need a couple tablespoons for a pan sauce or to deglaze a skillet. Once the cubes are frozen solid, pop them out into a freezer bag. Muffin tins work too — each well holds about half a cup, which is a handy size. Frozen broth keeps well for four to six months.
When you reheat, bring it to a gentle simmer on the stovetop. The microwave works in a pinch, but the stovetop gives you more control and lets you adjust the seasoning as it warms. If you froze it and the fat layer is mixed in, you might see it look a little separated when it thaws. That is perfectly normal — just stir it as it heats and it will come right back together.
For make-ahead, this is one of the best things you can cook on a quiet Sunday when you have nowhere to be. Make a big batch, portion it out, freeze it, and you have homemade broth ready for any recipe that calls for it, any night of the week.
Creative Ways to Use Leftover Chicken Broth
Quick Weeknight Egg Drop Soup
Heat two cups of chicken broth to a simmer, whisk an egg with a fork, and slowly drizzle it into the simmering broth while stirring gently. Add a splash of soy sauce and a few sliced green onions. Dinner in five minutes, and it tastes like you spent an hour on it.
Broth-Cooked Grits or Polenta
Replace the water in your grits or polenta with chicken broth and the difference is night and day. The grits come out creamy and savory without adding a thing. This is one of those tricks that costs nothing extra but makes everything taste better. Southern grits made this way are something special.
Pan Sauce for Pork Chops or Chicken
After you sear meat in a skillet, pour in half a cup of chicken broth while the pan is still hot. Scrape up all those brown bits stuck to the bottom — that is pure flavor. Let it reduce by half, stir in a pat of butter, and pour it right over the meat. Restaurant-quality sauce with almost no effort.
Braising Liquid for Greens
Use your chicken broth as the cooking liquid for collard greens, turnip greens, or cabbage. It adds a richness that water alone just cannot give you. Add a little vinegar and some red pepper flakes and you have a pot of greens that will make people ask what your secret is. Southern collard greens made with this broth are worth the effort every time.
Chicken Broth from Scratch – The Old-Fashioned Way
Equipment
- Large Stockpot (8-quart or larger)
- Fine mesh strainer
- Large Heat-Safe Bowl
- Ladle
- Cheesecloth (optional)
Ingredients
Broth
- 1 whole chicken about 4 pounds
- 2 large yellow onions quartered, skin on
- 4 celery stalks cut into 3-inch pieces, leaves included
- 3 large carrots scrubbed and cut into 3-inch pieces, no need to peel
- 4 garlic cloves smashed with the flat of a knife
- 2 bay leaves
- 1 tsp whole black peppercorns
- 4 fresh thyme sprigs
- 6 fresh parsley stems stems have more flavor than leaves for broth
- 1 tbsp apple cider vinegar
- 1 tbsp kosher salt adjust to taste
- 16 cups cold water enough to cover the chicken by about 2 inches
Instructions
Prepare the Pot
- Place the whole chicken in a large stockpot. Arrange the quartered onions, celery, carrots, and smashed garlic around the chicken.
- Add the bay leaves, peppercorns, thyme sprigs, and parsley stems. Pour in the apple cider vinegar and sprinkle the kosher salt over everything.
- Pour cold water over the chicken until it is covered by about 2 inches. Do not use hot water — starting with cold water draws out more flavor.
Simmer the Broth
- Place the pot over medium-high heat and bring to a boil. As soon as you see a rolling boil, reduce the heat to low so the surface barely trembles with a gentle simmer.
- During the first 30 minutes, use a ladle or large spoon to skim off any foam or scum that rises to the surface. This keeps the broth clear and clean-tasting.
- Let the broth simmer gently, uncovered, for 3 to 4 hours. The liquid should reduce by about one-third. Do not stir or disturb the pot — just let it do its work.
Strain and Finish
- Carefully remove the chicken from the pot and set aside. The meat can be picked off and saved for soups, salads, or sandwiches once cool enough to handle.
- Set a fine mesh strainer over a large heat-safe bowl. Pour the broth through the strainer, discarding the vegetables and aromatics. For crystal-clear broth, line the strainer with cheesecloth before pouring.
- Taste the broth and add more salt if needed. Let cool to room temperature, then refrigerate. A layer of fat will solidify on top — remove it before using or leave it for extra richness.
Nutrition
Rate This Recipe
Share This Recipe With The Ones You Love!Your Chicken Broth Questions, Answered
What is the difference between chicken broth and chicken stock?
In most home kitchens, the terms are used the same way and the results are close enough that it does not matter. Traditionally, stock is made with more bones and less meat, while broth uses a whole chicken or meat-heavy pieces. This recipe gives you the best of both because you are using the whole bird — bones, meat, and all.
Why is my chicken broth cloudy?
Cloudy broth almost always means the heat was too high. If the broth boils hard instead of simmering gently, it emulsifies the fat and proteins into the liquid. Skimming the foam in the first 30 minutes also helps. If yours came out cloudy, it still tastes fine — it just will not look as pretty.
Can I make chicken broth in a slow cooker?
You can, and it works well for convenience. Set it on low for 8 to 10 hours. The results are good, though I find stovetop broth has a slightly deeper flavor because you have more control over the simmer. If a slow cooker gets you to make homemade broth instead of buying it, then use the slow cooker and do not think twice about it.
How long does homemade chicken broth last in the refrigerator?
Four to five days in a sealed container is safe. The layer of fat that forms on top actually helps protect it and extends the freshness a little. According to the USDA cold food storage guidelines, cooked poultry broth should be used within three to four days for best safety, so aim for that window if you want to be on the cautious side.
Can I reuse the bones to make a second batch?
You can, but the second batch will be weaker than the first. Most of the flavor and gelatin comes out in that first long simmer. If you do make a second batch, plan to use it for cooking rice or grains where it does not need to stand on its own. For a proper broth you would serve in a bowl, use fresh bones.
Should I roast the chicken first?
Roasting adds a deeper, more complex flavor but it is not required. A traditional unroasted broth has a cleaner, lighter taste that works beautifully for most recipes. If you want something richer and darker for French onion soup or beef-style dishes, roasting is worth the extra step. Both versions are excellent.
Do I need to use a whole chicken or can I use parts?
You can absolutely use parts. Backs, necks, wing tips, and thighs all make wonderful broth. Avoid using only breast meat — it makes a thin, bland broth because there is not enough bone, cartilage, or fat. The more joints and bones in the pot, the more body your broth will have.
Go Make a Pot of Real Chicken Broth
There is no recipe in this kitchen that gets used more than this one. A pot of good chicken broth is the starting point for so many meals, and once you have the real thing in your refrigerator, you notice the difference in everything you cook. Your soups have more depth. Your gravies have more body. Even a simple pot of rice becomes something worth sitting down for.
This is not a complicated thing to make. It is a patient thing to make, and there is a difference. Set up the pot, let it do its work, and a few hours later you have something that no store-bought carton will ever come close to. I hope you try this chicken broth recipe, and I hope it becomes as much a part of your kitchen as it has been a part of mine. When you make it, come back and tell me how it turned out. I would love to hear about it.