This quick and easy pickled red onions recipe is the essential, game-changing condiment your kitchen needs.
I know the feeling: you’re finishing up a wonderful meal—maybe some gorgeous, rich Southern Fried Chicken or a hearty bowl of chili—and you look at it, and you just know something is missing. It’s that little burst of zing, that high note of acid that cuts through the fat and brings the whole plate into balance. For the longest time, I used to think that kind of vibrant flavor only came from expensive jars or complicated, days-long preserving. But, bless my mother’s heart, she taught me the secret to quick pickling, and once you have this simple pickled red onions recipe in your back pocket, you’ll never look at a boring weeknight meal the same way again. It takes less than 15 minutes of your time to create a condiment that delivers pure, unadulterated sunshine to your table, and I’m going to share all the insider tips for getting that perfect balance of sweet, salty, and tangy.
Why This Pickled Red Onions Recipe Works
In southern cooking, we appreciate efficiency just as much as we love flavor. While shelf-stable canning has its place, this particular method is about speed and maintaining texture. That is its genius. This isn’t a long-term preservation project; it’s a flavor-booster that is ready to use in about an hour. That quick turnaround is what makes it so useful.
The Secret of the Warm Brine
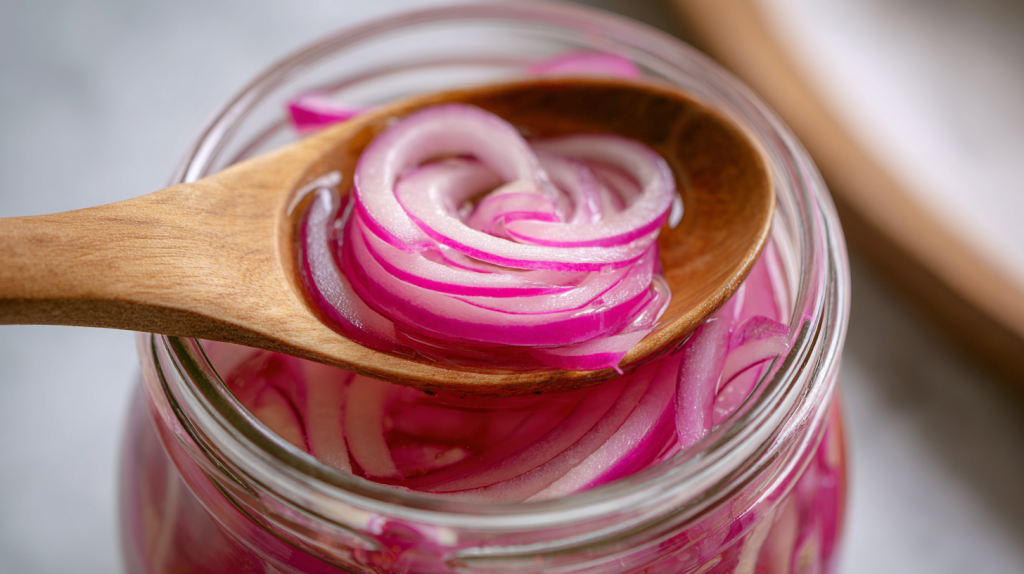
The magic truly lies in the brine’s temperature. Now, the common misconception is that you need to boil the onions to get them soft. That is not true! Boiling the onions often gives you a soft, sometimes mushy result. The secret is using a brine that is warm. It needs to be hot enough to instantly dissolve the sugar and salt, but not so hot that it aggressively cooks the red onions. When you pour that warm liquid over the thinly sliced onions, it gently starts the softening process. The acid from the vinegar then begins a chemical reaction that changes the onion’s pigment. It turns those vibrant red rings into a beautiful, electric pink. It’s a joy to watch, and it’s a sure sign that the transformation is complete.
The Perfect Vinegar Blend
I’ve been making my own version of this recipe for over forty years, and I learned that the key to a truly successful quick pickle is the ratio. Our recipe uses a careful balance of two vinegars, which gives a far more complex flavor than just plain white vinegar. The apple cider vinegar brings a subtle fruitiness and depth. The white vinegar provides the clean, sharp tang that makes this condiment so addictive. It’s this marriage of sharpness and mellow sweetness that elevates these beyond anything you can buy at the store.
Pro-Tip: The Brine Temperature Check Do not allow the brine to come to a rolling boil. You want it hot enough to dissolve the granules quickly. Remove it from the heat when you see steam rising freely. The goal is a crisp-tender, not mushy, final product. If you wait until the moment the brine is perfectly clear, you’ll know the granules are dissolved. The liquid will be at the perfect temperature for pouring.
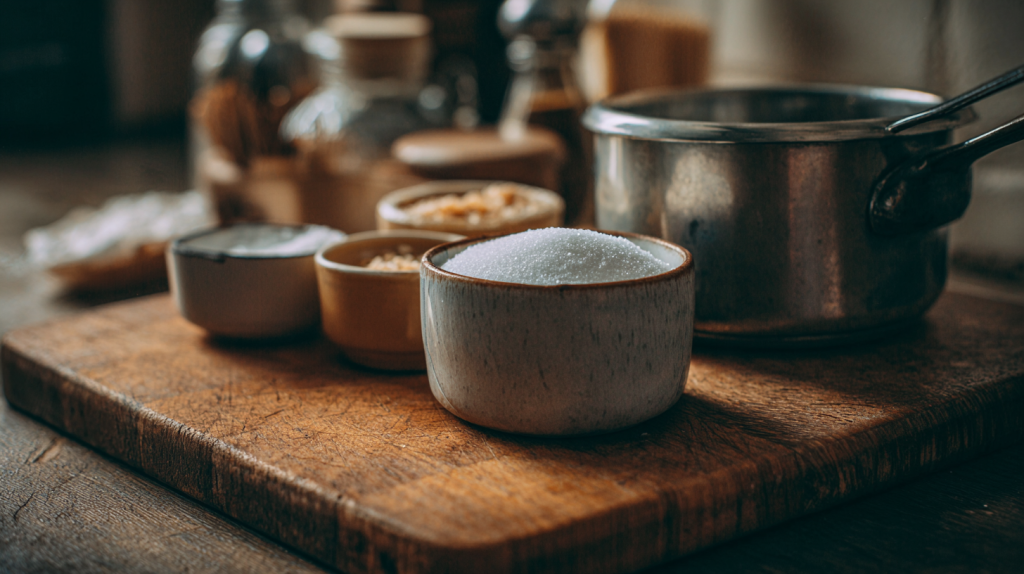
The Key Ingredients: Secrets to Flavor
You’d be surprised how much the quality of just a few simple ingredients can affect the outcome of your quick pickles. We are not using any fancy stabilizers here, so what you put in is what you get out!
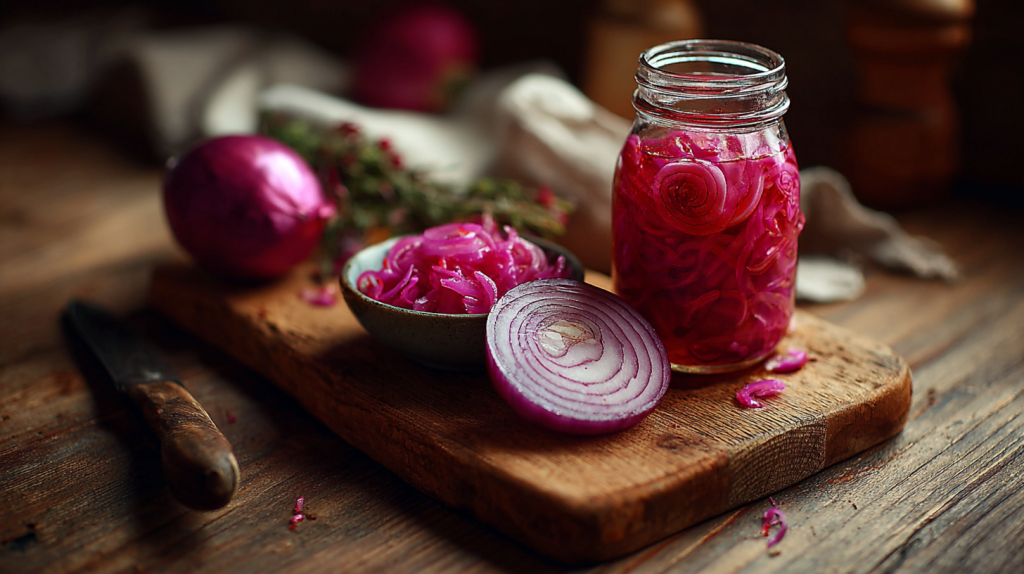
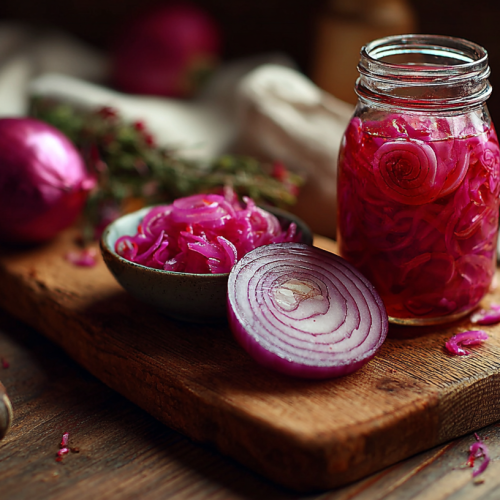
Choosing the Right Onion
The Red Onion itself is the star, of course. When you’re at the market, look for firm, heavy onions with tight, dry outer skins. Avoid any that feel soft or have sprouted green tips, as they won’t have the same crispness. Their deep red color is packed with anthocyanins. This is the natural pigment that reacts with the acid in the vinegar to give us that stunning pink hue we’re looking for. I’ve found that using medium-sized onions is easiest for slicing and packing into jars.
Balancing the Brine
We rely on equal parts apple cider vinegar and white vinegar. Many recipes will tell you to use all white vinegar, and while that works, it gives a very one-note flavor. The apple cider vinegar has a subtle sweetness and an earthy flavor that adds a layer of sophistication. It moves this condiment from just “tangy” to truly “delicious.” The white vinegar ensures the acidity is high enough to properly pickle the onions and maintain safety. For the Sweetener and Salt, we use granulated sugar and sea salt. The sugar is not just for sweetness; it rounds out the sharpness of the vinegar. This balances the taste so the onions complement your food instead of overwhelming it. I prefer using sea salt over iodized table salt because it dissolves much cleaner and doesn’t impart a metallic aftertaste.
Quick Substitution Guide
I understand that sometimes you just have to work with what you have on hand. If you need to make a swap, here’s my wisdom on what works:
- Vinegar: If you only have one kind, use all white vinegar. Know that the flavor will be sharper. Rice wine vinegar is a good substitute for a milder, slightly sweeter pickle, but you may need to add a touch more salt.
- Sweetener: You can substitute the granulated sugar with honey or maple syrup. Just remember that liquid sweeteners are sweeter by volume. They can slightly change the color of the final brine. Start with 2 tablespoons and taste a small spoonful of the brine before pouring.
- Salt: Fine sea salt or kosher salt is best. Avoid rock salt or coarse salts as they can take too long to dissolve.
How to Make Pickled Red Onions: My Step-by-Step Method
 The recipe card gives you the steps, but a good cook knows that the real success is in the technique—the gentle movements and the sensory cues that tell you you’re doing it right.
Preparing the Onions for Pickling
The very first step is the most crucial part of this pickled red onions recipe: slicing the onions. The thickness of your slices dictates both the texture of the finished product and the time it takes to pickle. My recipe calls for paper-thin slices because that’s what makes them ready in an hour. If you like a little more crunch, you can cut them slightly thicker.
- Pro-Tip: Use Your Sharpest Tool. While a mandoline slicer is the gold standard for uniformity and speed, your sharpest chef’s knife will work just fine. Take your time, focus on evenness, and be sure to curl your fingers under for safety. Uniformity is key here because it ensures every piece of onion is pickled and softened at the same rate. Uneven slices mean you’ll have some crunchy pieces and some mushy pieces.
Creating the Brine Base
This is the part where we create the flavor base. Combine the vinegars, water, sugar, and salt in a medium saucepan. This step is simple, but the stirring and temperature control are what matter. Place the pan over medium heat and stir constantly for about a minute. The goal here is not to boil the mixture, but simply to dissolve the sugar and salt.
- Insider Secret: The Clear Brine Cue. You’ll know the brine is ready when the liquid turns absolutely crystal clear. If you stop stirring too early, you’d find a grainy residue at the bottom of the pan, and that means your brine isn’t balanced. It needs to be fully dissolved to penetrate the onions correctly. Immediately remove the pan from the heat once it’s clear.
The Critical Pour and Rest
Once the brine has cooled for just a moment (about 2-3 minutes), carefully pour it over the sliced onions in the jar. Make sure the onions are fully submerged. I always leave about a half-inch of headspace at the top.
- Sensory Cue: The very best part is watching the transformation. Within a few minutes, you’ll see the sharp red color of the onion start to bleed into the brine. The onion itself will begin to blush and turn that gorgeous, vivid pink. That’s the acid at work, and it’s your visual cue that the pickling process has officially begun. The onions are ready when they have fully softened and turned a uniform pink—at least an hour. But truthfully, they taste best after an overnight rest in the refrigerator. This pairs beautifully with any coleslaw recipe.
Serving Suggestions & Perfect Pairings
The beauty of these quick pickles is their versatility. They are so much more than just a garnish; they are an essential element on your plate. They act as a secret weapon to cut through richness and add an unexpected pop of flavor. This is true southern cooking philosophy—every element must contribute.
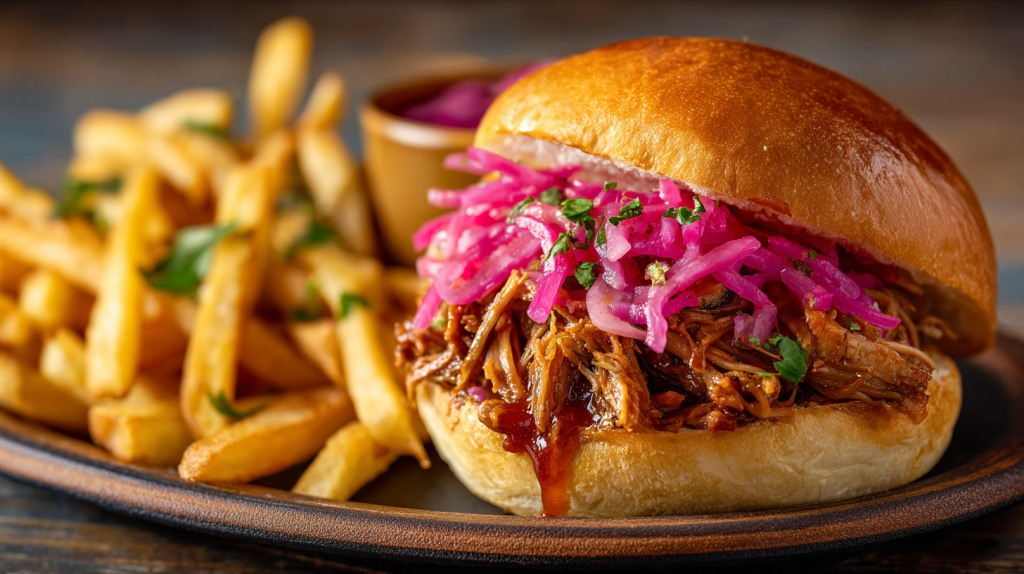
If you are serving rich, slow-cooked meats, the acid from the pickled onions is non-negotiable. Think about a tender, smoky pile of Smoked Pulled Pork on a bun. That tangy pickle is necessary to stop the richness from weighing down your palate. The same goes for any kind of fatty fish taco or a heavy, savory burger. The vinegar rinse brightens everything up, making the whole meal feel lighter and more complex.
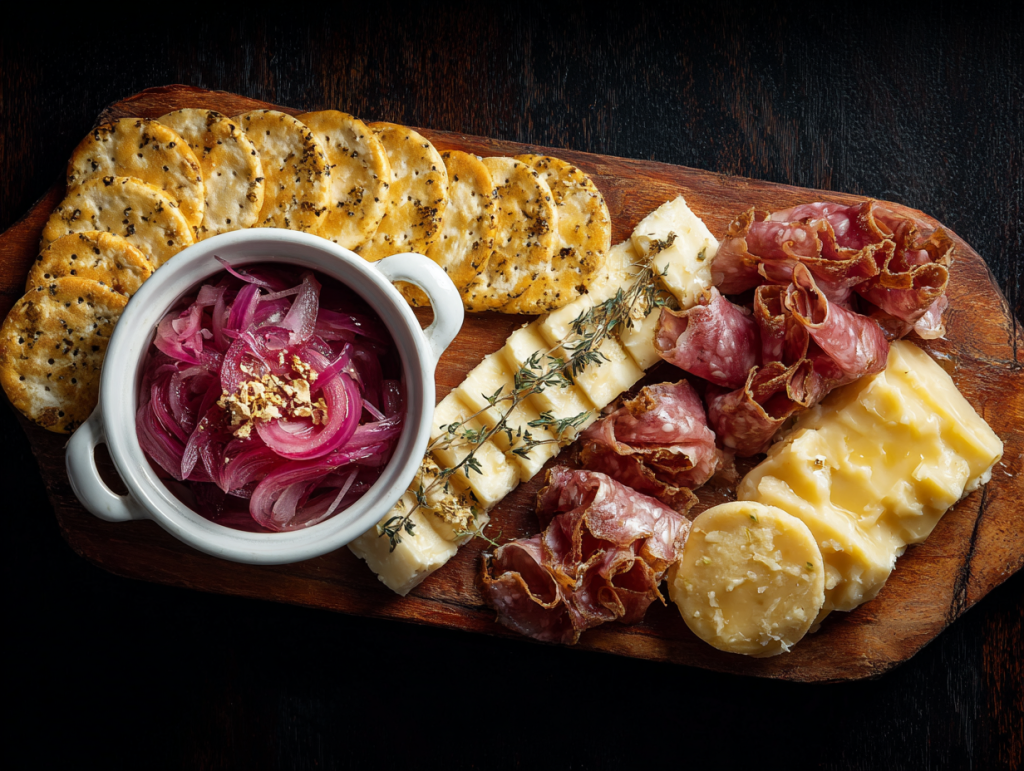
For salads, I often use a spoonful of these and a drizzle of the brine as a simple, high-impact dressing. It works wonders on a hearty lentil or grain salad. If you’re hosting a gathering, they are a phenomenal addition to any cheese or charcuterie board, sitting right next to the cornichons and olives. Their gorgeous color is a feast for the eyes, too!
Delicious Variations to Try
Once you master the basic pickled red onions recipe, you can start playing with the flavors and making it your own. That’s where the real fun of cooking begins—adapting a dish to fit your family’s tastes.
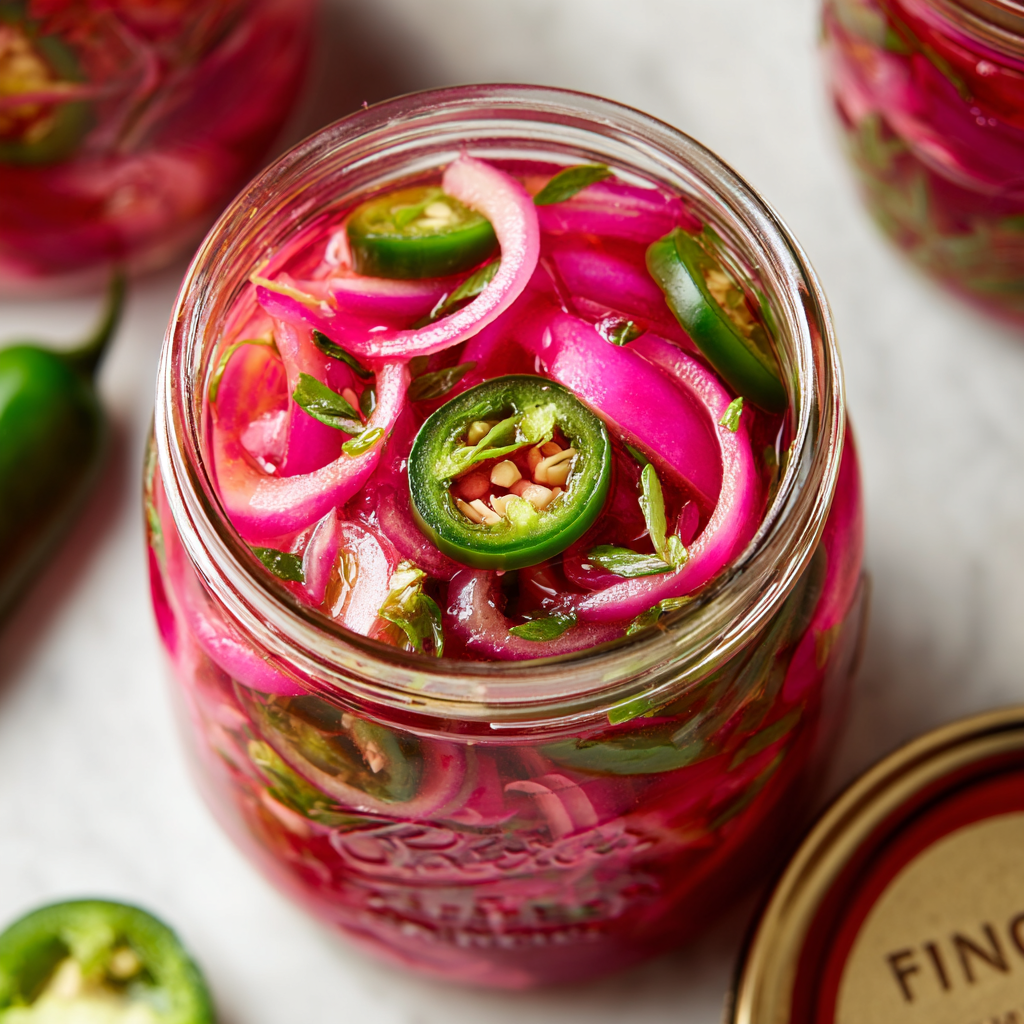
The Spicy Kick
For the folks who like a bit of heat (and there are always a few in every southern family!), just slice one fresh jalapeño or serrano pepper thinly. Add it right into the jar with the onions. The heat from the pepper will infuse the brine and give the finished onions a lovely, slow burn. The heat plays beautifully against the sweet tang. I’ve found that this is particularly wonderful on breakfast burritos or hearty bean chili.
Sweetened with Honey
If you prefer a richer, more floral sweetness, swap out the granulated sugar for 3 tablespoons of local honey or maple syrup. These liquid sweeteners add a slight molasses note, giving the onions a deeper color and a wonderful, complex sweetness. Be sure to stir well to ensure the honey is fully incorporated into the warm brine before pouring.
Herbaceous Delight
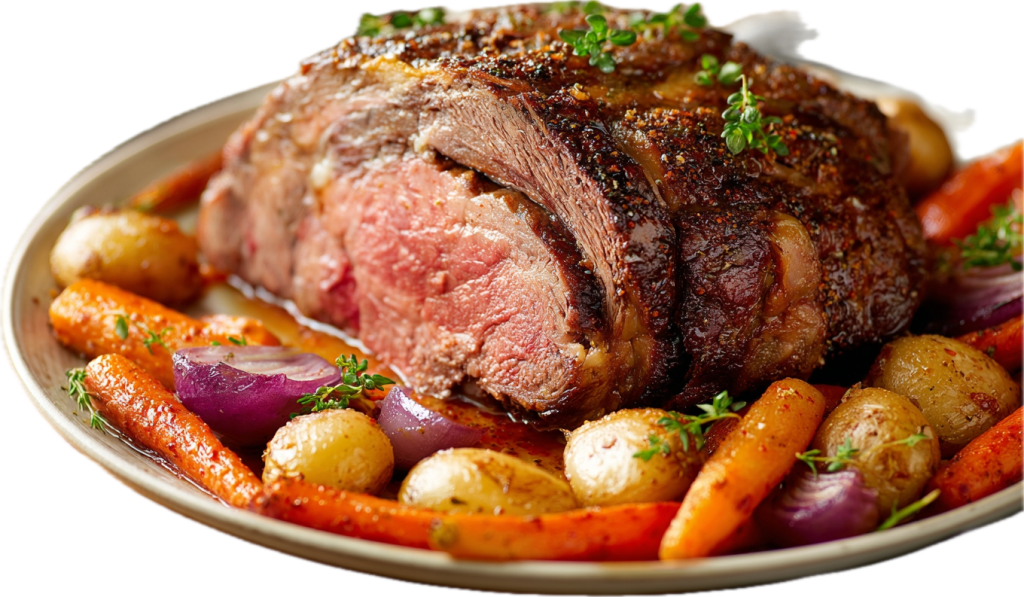
For a more savory, sophisticated pickle, add a few sprigs of fresh dill and a teaspoon of black peppercorns to the jar before pouring the brine. The dill brings a fresh, earthy flavor that is perfect for pairing with smoked salmon or delicate sandwiches. You could also try a sprig or two of fresh thyme, which is wonderful with roasted chicken.
Storage, Reheating & Make-Ahead Tips
 One of the great gifts of this pickled red onions recipe is how wonderfully it keeps. This is ideal for a busy cook. Making a double or triple batch once a month is a great time-saver.
The Make-Ahead Advantage
These are quick pickles, meaning they are not shelf-stable like those canned for the winter. They must be kept sealed in the refrigerator. As long as the onions remain fully submerged in the brine, they will keep beautifully for 2–3 weeks. If you notice the liquid levels dropping, simply press the remaining onions down with a fork to keep them under the surface. This submersion is critical for food safety and preventing mold.
The reality is, while these are ready in an hour, they taste significantly better the next day. The flavors truly marry overnight. The onions soften to that perfect, crisp-tender texture. I recommend making them on Sunday afternoon; they’ll be ready to jazz up your weeknight dinners by Monday.
Dealing with Cloudiness
Don’t be alarmed if, after a week, your brine starts to look a little cloudy. That is often just a natural result of the starches and sugars in the onions leaching out into the brine. As long as there are no telltale signs of spoilage—like mold, fizzing, or an off smell—they are absolutely fine to eat. You can learn more about the science of brines and food safety here: Detailed Food Safety Guidelines for Quick Pickling.
Leftover Magic: Creative Ways to Use Pickled Red Onions
What happens if you have just a few precious spoonfuls of those beautiful pickles left? You certainly don’t want to waste them. Fortunately, the tang and texture are fantastic starting points for other dishes.
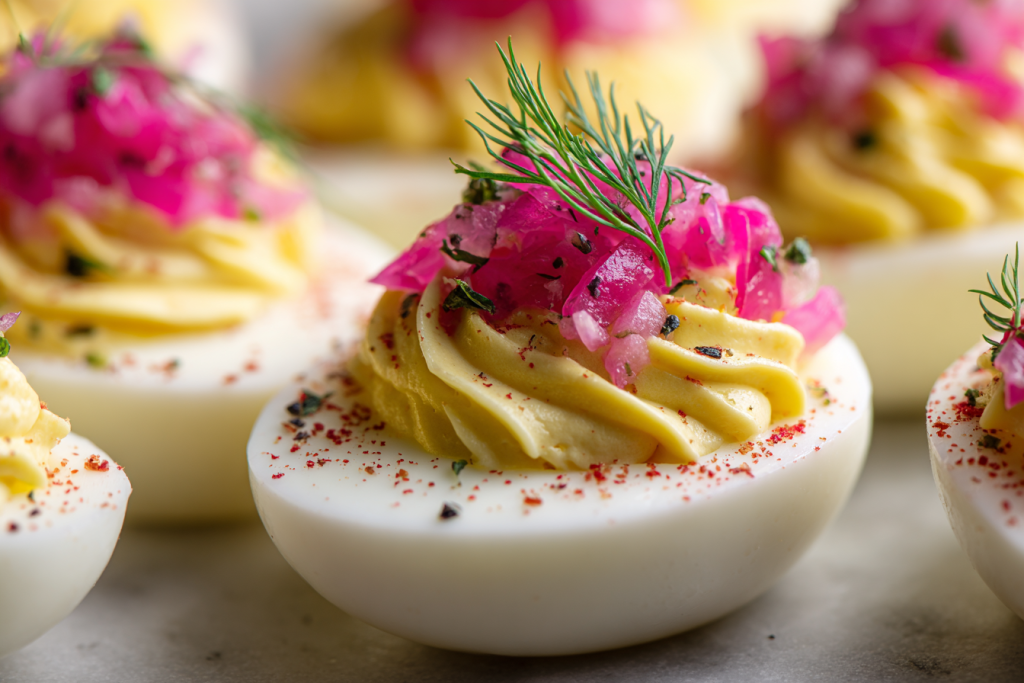
I love treating these pickled red onions leftovers as a flavorful garnish, much like you would a finely chopped relish. My favorite use is to turn them into an instant, high-impact flavor boost for simple egg dishes. Finely chop a few rings and fold them into a batch of classic Southern Deviled Eggs. The acid cuts through the richness of the yolk and mayonnaise, creating an elegant, unexpected bite. They also add great texture and color to a scrambled egg or omelet.
Another wonderful option is to use the remaining onions and the brine to create a quick, tangy topping for baked potatoes or potato salad. Just chop them finely and mix them right into the dressing. You’ll find that using the brine as part of a vinaigrette base—perhaps mixed with a little olive oil and mustard—is an effortless way to create a low-fat, high-flavor salad dressing. It will remind you of the very first bite of those onions. The brine has absorbed so much of the onion flavor; it’s a shame to pour it down the drain. You can delve into how the vinegars transform the pigments here: The Science Behind Vinegar Brines and Anthocyanins.
Troubleshooting: Your Questions Answered
Even the simplest recipes can sometimes throw you a curveball. That’s usually because a small piece of technique needs adjusting. Don’t fret; almost every kitchen mishap has a simple, experience-based fix.
Why are my pickled red onions mushy?
Mushiness is almost always caused by one of two things: either your onions were sliced too thin or your pickling brine was too hot—likely boiling. If the onions are too thin, the hot liquid essentially flash-cooks them. For the next batch, ensure the brine is just hot enough to dissolve the salt and sugar (remove from heat immediately!). Slice the onions a little thicker to maintain that lovely snap.
Can I make this ahead of time?
Yes, absolutely! These are best when made ahead. While you can eat them after one hour, the flavors really deepen and mature overnight in the refrigerator. I suggest making them 12 to 24 hours before you plan to serve them for the best possible result.
How long do I have to wait before they are ready?
You can technically start eating them after one hour. That is enough time for the acid to soften the onion and for the color to turn pink. However, for that deep, balanced flavor where the sharpness has mellowed and the sweetness shines through, I recommend giving them at least 12 hours, or better yet, a full night in the refrigerator.
Can I reuse the pickling brine?
No, you shouldn’t reuse the pickling brine. While it might look fine, the onion juice that leaches into it dilutes the acid and salt content. This makes it unsafe for preserving another batch. You need a properly measured ratio of acid and salt for both safety and flavor. You can, however, use the leftover brine in a salad dressing or to marinade vegetables for immediate use.
What if I don’t have apple cider vinegar?
If you don’t have apple cider vinegar, use all white vinegar. Know that the flavor will be a little sharper and less complex. You can compensate slightly by adding a few black peppercorns or a bay leaf to the brine to introduce some other aromatic notes.
My brine is cloudy. Are they still safe to eat?
Yes, almost certainly! The cloudiness is usually just starches and sugars that have been drawn out of the onion. This is completely natural. The brine is highly acidic, which is what keeps them safe. You only need to worry if you see obvious mold forming, or if there is any sign of fermentation, like bubbles rising when you open the jar, or a truly foul odor.
Can I use brown sugar instead of granulated sugar?
You certainly can, but be aware of the effect. Brown sugar has a higher moisture content and a slight molasses flavor. This will change the color of your brine to a darker hue and give the pickles a much deeper, richer taste. If you’re going for a bright, clean, classic flavor, stick with granulated sugar. If you want a savory, complex pickle perfect for a barbecue sandwich, then brown sugar is a lovely choice.
This pickled red onions recipe is simple, life-changing, and absolutely essential for anyone who loves cooking with bright, bold flavors. By focusing on the perfect slice, the right brine temperature, and that beautiful, patient waiting game, you’ve created a definitive condiment that will elevate everything from your tacos to your tuna salad. You’ve got the wisdom now, and I can’t wait to hear how this vibrant addition turns out in your kitchen!
Quick & Easy Pickled Red Onions
Equipment
- Mandoline slicer
- 16-ounce mason jars
- Medium saucepan
- Measuring cups
Ingredients
- 2 medium red onions thinly sliced
- 1 cup apple cider vinegar
- 1 cup white vinegar
- 2 cups water hot but not boiling
- 3 tablespoons granulated sugar
- 2 tablespoons sea salt
Optional Add-ins
- 2 cloves garlic peeled and smashed
- 1 teaspoon mixed peppercorns
Instructions
- Using a mandoline or sharp knife, slice the red onions as thinly as possible into uniform rings or half-moons. Pack the sliced onions into two clean 16-ounce mason jars, distributing them evenly. If using garlic and peppercorns, add them to each jar now.
- In a medium saucepan, combine the apple cider vinegar, white vinegar, hot water, sugar, and salt. Place the pan over medium heat and stir continuously until the sugar and salt have completely dissolved, which should take about 1 minute. Remove from heat and allow the brine to cool slightly for 2-3 minutes.
- Carefully pour the warm pickling brine over the onions in each jar, ensuring the onions are fully submerged in the liquid. Use a spoon to press down any floating pieces. Leave about half an inch of headspace at the top of each jar.
- Allow the jars to sit uncovered at room temperature until they've cooled completely, approximately 20-30 minutes. Once cooled, seal the jars with their lids.
- Let the pickled onions rest for at least one hour before using. For best results and maximum flavor development, refrigerate overnight. The onions are ready when they've turned a vibrant pink color and have softened. Store sealed in the refrigerator for up to 2-3 weeks.
Notes
Notes
- The thinner you slice the onions, the faster they'll pickle - paper-thin slices will be ready in about an hour, while thicker cuts need overnight refrigeration.
- You can substitute any type of vinegar (white wine vinegar, rice vinegar, or all white vinegar) based on what you have available, or use a combination for a more complex flavor.
- For sweeter pickled onions, increase the sugar to 1/4 cup; for tangier onions with more bite, reduce it to 2 tablespoons or use honey or maple syrup instead.
- These pickled onions can be stored in the refrigerator for up to 3 weeks as long as the onions remain fully submerged in the brine.
- This recipe doubles easily - just make sure you have enough clean jars with tight-fitting lids to store them.
- If you don't have a mandoline, use your sharpest knife and take your time to create uniform slices for even pickling.
Nutrition
Rate This Recipe
Share This Recipe With The Ones You Love!