It’s a funny thing, isn’t it? Something as simple as boiling an egg can cause so much kitchen heartache. I’ve seen more good eggs turn into a rubbery, frustrating mess than I can count. You end up with stubborn shells that take half the egg white with them, or you slice one open to find that sad, grey-green ring around a chalky yolk. It’s enough to make you give up. But I’m here to tell you that the secret to perfect hard boiled eggs isn’t about fancy gadgets or complicated steps. It’s about a simple, gentle method, the one my mother used, and her mother before her. And I’m going to share it with you.
My Tried-and-True Method for Perfect Hard Boiled Eggs
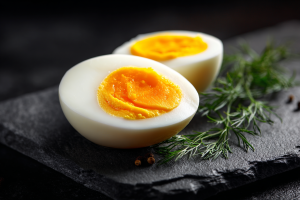 This method has never failed me. The key isn’t a hard, rolling boil, but a patient, gentle simmer. It respects the egg and coaxes it to perfection, rather than shocking it into submission. You get tender whites, creamy, bright-yellow yolks, and shells that slip right off.
First things first, choose your eggs. This is one of the very few times in the kitchen when fresh is not best. Eggs that are a week or two old will peel significantly easier than ones fresh from the farm.
- Start Cold: Gently place your eggs in a single layer at the bottom of a saucepan. Don’t stack them. Giving them space is the first step to preventing cracks. Then, cover them with at least an inch of cold water.
- Bring to a Simmer: Place the pan on the stove over medium-high heat. Bring the water to a gentle, rolling simmer. You’re not looking for a furious, churning boil, which can bounce the eggs around and cause them to crack.
- Turn Off the Heat & Cover: As soon as the water reaches that gentle simmer, turn off the burner completely. Leave the pan on the warm stove, cover it with a tight-fitting lid, and let the eggs sit. This is where the magic happens. The residual heat will cook them through perfectly.
- Set a Timer: For a classic hard boiled egg with a firm, creamy yolk, let them sit in the hot water for 10-12 minutes.
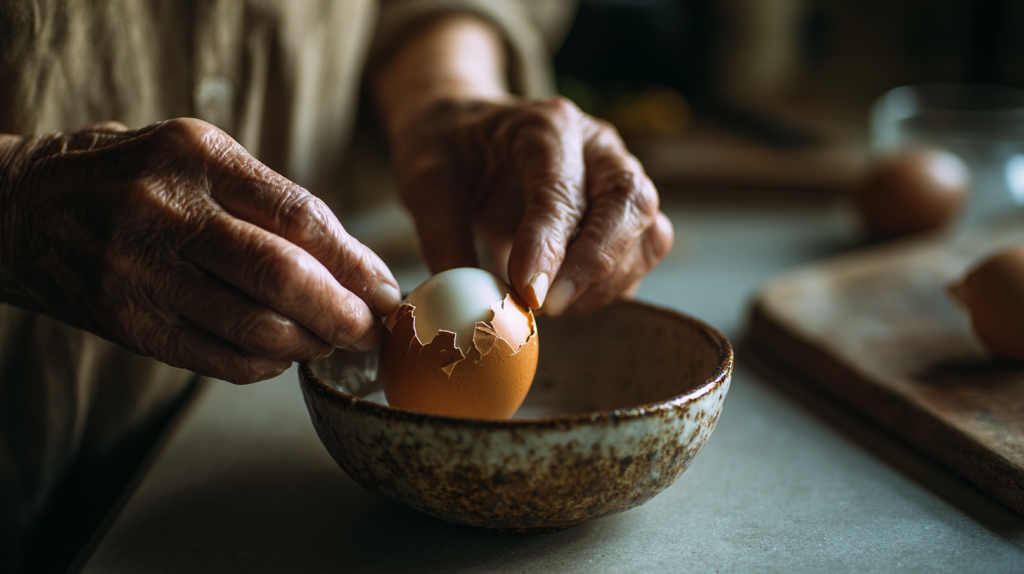
- The Ice Bath (Don’t Skip This!): While the eggs are resting, prepare a large bowl of ice water. When the timer goes off, use a slotted spoon to immediately transfer the hot eggs into the ice bath. This crucial step does two things: it stops the cooking process instantly, preventing that dreaded green ring, and it helps the egg white pull away from the shell, making peeling a breeze. Let them cool completely in the bath for at least 15 minutes.
Elevating Your Christmas Dinner with Deviled Eggs
 There is no dish that says “special occasion” in my home quite like a platter of deviled eggs. They are the first thing to disappear at every gathering, especially at Christmas dinner. A beautiful tray of them, maybe with a little sprinkle of paprika, is as festive as any decoration. And when you start with a batch of perfect hard boiled eggs, making them becomes a joy instead of a chore. No more fighting with shells or trying to mash up dry, overcooked yolks. With this method, you get the perfect creamy base for Deviled Eggs Recipe with Relish: A Timeless Family Classic, which is a must-have for any holiday spread.
Common Mistakes to Avoid When Making Hard Boiled Eggs
Over the years, I’ve seen a few common missteps that lead to disappointment. Let’s make sure you can sidestep them.
- Starting with Boiling Water: Dropping a cold egg into boiling water is a recipe for a cracked shell. The sudden temperature shock is just too much for it. Always start with cold water.
- Crowding the Pan: If the eggs are rattling against each other, they’re more likely to crack. Give them room to sit comfortably in a single layer.
- Skipping the Ice Bath: I know it feels like an extra step, but it is the single most important secret to an easy-peel egg and a perfectly cooked yolk. The rapid cooling is what makes all the difference.
Insider Secret: The Science of the Peel That frustratingly stubborn shell is all about pH levels. Fresher eggs have a lower pH, which causes the egg white’s proteins to cling tightly to the shell’s inner membrane. As an egg ages, it releases carbon dioxide, raising its pH and making that membrane less sticky. The ice bath shock also causes the egg white to contract slightly, creating a tiny gap that makes peeling much easier.
More Ways to Enjoy Your Perfect Hard Boiled Eggs
Once you’ve mastered this simple skill, a world of possibilities opens up. They are a wonderful, protein-packed snack all on their own with a pinch of salt. They can be chopped into a creamy egg salad, sliced onto a fresh green salad for a quick lunch, or pickled for a tangy treat. Having a bowl of these ready in the refrigerator is like having a head start on a week of easy, healthy meals.
Pro-Tip: The Gentle Roll For the absolute easiest peeling experience, after your egg has cooled completely, gently tap it on the counter to create a few cracks. Then, roll it gently between your palm and the counter to create dozens of tiny fractures all over the shell. This loosens the entire shell, and it often comes off in just one or two large, satisfying pieces.
A Recipe for Confidence in the Kitchen
There’s a real satisfaction that comes from mastering a foundational kitchen skill. It’s not about being a fancy chef; it’s about knowing you can rely on a method to give you a simple, beautiful result every single time. These perfect hard boiled eggs are more than just food; they are a small piece of kitchen confidence. They are the start of a delicious deviled egg platter for your family, a quick and healthy lunch for yourself, and a reminder that the best things in life are often the most simple.