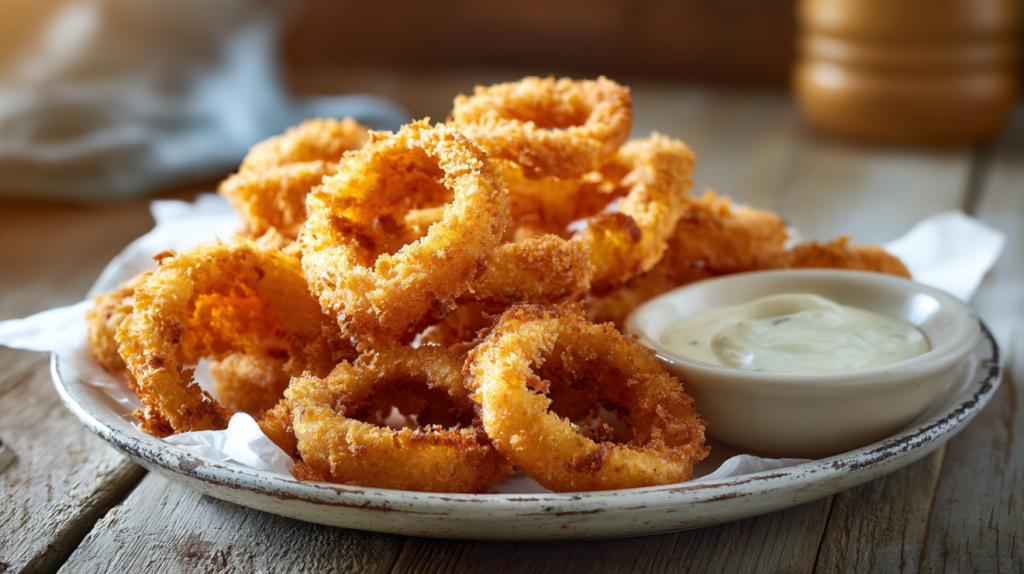
There is nothing quite like biting into a perfectly fried onion ring — that first crack of golden crust giving way to a sweet, tender ring of onion that practically melts on your tongue. This onion ring recipe is the one that will make you stop ordering them anywhere else.
If you have tried making onion rings at home before and ended up with soggy batter sliding right off into the oil, or a crust so thick it could stop a door, I understand that frustration. I have been there myself, standing at the stove watching rings fall apart and wondering what went wrong. But after decades of frying — and plenty of batches that taught me what not to do — I finally have a method that works every single time. The crust stays on. The onion stays tender. And the whole plate disappears before it ever gets to the table.
This recipe walks you through every step, from choosing the right onion to getting your oil at the perfect temperature. By the time you are done reading, you will have everything you need to make the best onion rings of your life.
Why a Good Onion Ring Is Worth the Trouble
The onion ring has been a fixture on Southern tables and roadside diners for generations. It is one of those foods that seems simple until you try to make it right, and then you realize there is real skill involved. The best ones I ever had were at a tiny fish camp outside of Valdosta, Georgia — hand-cut sweet onions, battered to order, and fried in a cast iron kettle that had been seasoning for longer than I had been alive. That was the moment I decided I was going to learn to make them at home.
What I learned over the years is that the difference between a great onion ring and a mediocre one comes down to three things: the onion, the batter, and the oil temperature. Get those three right, and you are ninety percent of the way there. Get any of them wrong, and no amount of fancy seasoning will save you.
This version is the one I settled on after years of testing. It uses a buttermilk soak to tenderize and flavor the rings, a seasoned flour-and-cornstarch dredge that fries up shatteringly crisp, and a double-coating technique that keeps everything locked on tight. It is the recipe I make for cookouts, for football Saturdays, and for any evening when I want something from the fryer that is truly worth the effort. If you are looking for a deeper dive into all the techniques behind good Southern food, I keep everything organized in The Complete Guide to Southern Cooking: Techniques, Traditions & Time-Tested Wisdom.
What Makes This Onion Ring Recipe Work
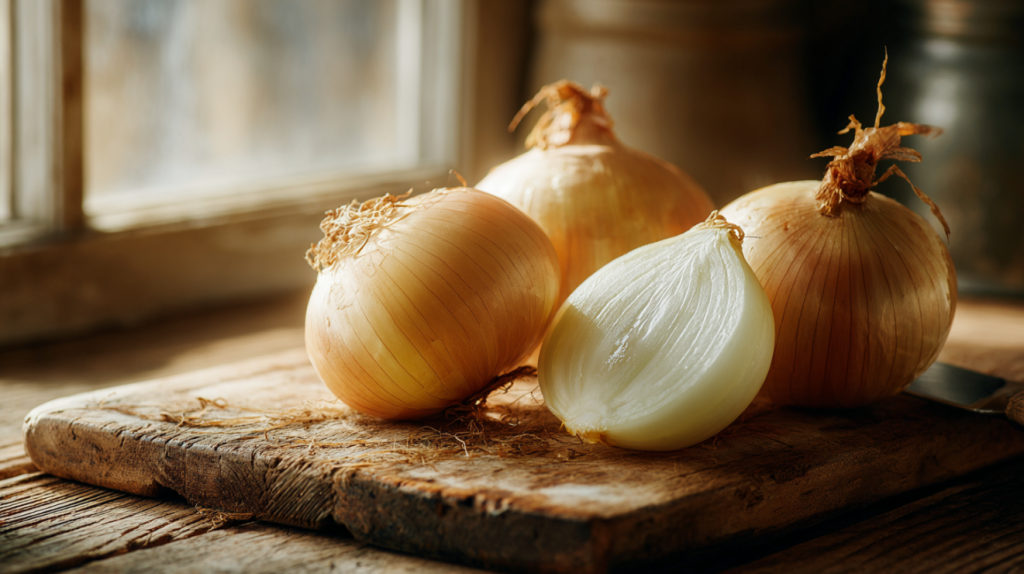
The onion is the foundation. I use Vidalia sweet onions because they have a high sugar content and a mild flavor that turns almost buttery when they hit the hot oil. Regular yellow onions will work in a pinch, but they are sharper and will not have that same sweetness that makes a truly great ring. White onions are too sharp for my taste, and red onions bleed color into the batter. If you cannot find Vidalias, look for Walla Walla or Maui onions — they are in the same family and will treat you well.
The buttermilk soak is doing more work than most people realize. It is not just adding flavor — the acidity in buttermilk tenderizes the onion slightly and gives the flour something to grip. A plain onion dipped in dry flour will shed its coating the moment it hits the oil. An onion that has soaked in seasoned buttermilk holds onto that dredge like it was made for it. If you are curious about all the ways buttermilk shows up in Southern cooking, I go into that in Buttermilk: The Southern Secret Weapon — it is one of the most versatile ingredients in the kitchen.
The real secret in this dredge is the cornstarch. Mixing half a cup of cornstarch into the flour creates a coating that fries up lighter and crispier than flour alone. Flour gives you structure and browning. Cornstarch gives you that shatteringly crisp, almost glass-like crunch. Together, they are unbeatable. The seasoning blend — garlic powder, onion powder, smoked paprika, and a touch of cayenne — adds warmth and depth without overpowering the sweetness of the onion itself.
Here is a quick reference if you need to swap anything out:
- Buttermilk substitute: Stir 1 tablespoon of white vinegar into 1 cup of whole milk and let it sit 10 minutes. It works, but real buttermilk gives better tang and cling.
- Gluten-free option: Replace the all-purpose flour with a 1:1 gluten-free flour blend. Keep the cornstarch. The texture will be slightly different but still very good.
- Oil options: Peanut oil is ideal for its high smoke point and clean flavor. Vegetable oil or canola oil are fine substitutes. Avoid olive oil — it smokes too easily at frying temperatures.
How to Make the Crispiest Onion Rings You Have Ever Had
This is where we get into the real teaching. The recipe card gives you the bones, but this is where I stand next to you and walk you through every detail — the things you need to see, smell, hear, and feel to know you are doing it right. Good frying is not about following a timer. It is about paying attention.
Preparing the Onions
Start by cutting both ends off each onion and peeling away the papery skin. Slice the onions into rounds about half an inch thick — you want them substantial enough to hold up in the oil but not so thick that the onion is still crunchy when the crust is done. Once you have your rounds, separate them into individual rings. I keep the large and medium rings for frying and set the small inner rings aside — those little ones are hard to coat evenly and tend to overcook.
Drop all your rings into a big bowl and pour the buttermilk and hot sauce over them. Toss everything gently with your hands so every ring is coated. Let that sit for at least fifteen minutes. You can go up to an hour if you have the time — the longer the soak, the more tender and flavorful the onion will be.
Building the Coating
While the onions soak, whisk together the flour, cornstarch, and all the seasonings in a wide, shallow bowl. I like a bowl better than a plate for this because it keeps the flour contained when you are pressing the rings in.
Now, this is where most people go wrong. They dip the ring in the flour and drop it straight into the oil. That is a recipe for disappointment. What you want to do is lift each ring out of the buttermilk, let the excess drip off for a second or two, and then press it firmly — both sides — into the seasoned flour. Really press it in. You want that flour worked into every curve and crease of the ring.
For an extra-crispy, restaurant-quality crust, do a double dip: after the first flour coat, dip the ring back into the buttermilk briefly, then press it into the flour again. This double coating creates a thicker shell that fries up incredibly crunchy. Set each coated ring on a wire rack — not a plate. The rack lets air circulate underneath so the coating does not get soggy on the bottom while you finish the rest.
Let the coated rings sit on that rack for a full five minutes before they go anywhere near the oil. This resting step is everything. It gives the coating time to hydrate and bond, which means it will not slide off in the fryer. If you are new to breading and frying, I cover the full technique in The Wet-Hand, Dry-Hand Method: Breading Techniques for Perfect Frying — it is one of those skills that changes everything once you learn it.
Getting Your Oil Right
Pour enough oil into a heavy-bottomed pot or Dutch oven to give you about three inches of depth. If you have a cast iron Dutch oven, this is its time to shine — cast iron holds heat better than anything else, and steady heat is the key to even frying. I talk more about why cast iron makes such a difference in Cast Iron Cooking: The Southern Way.
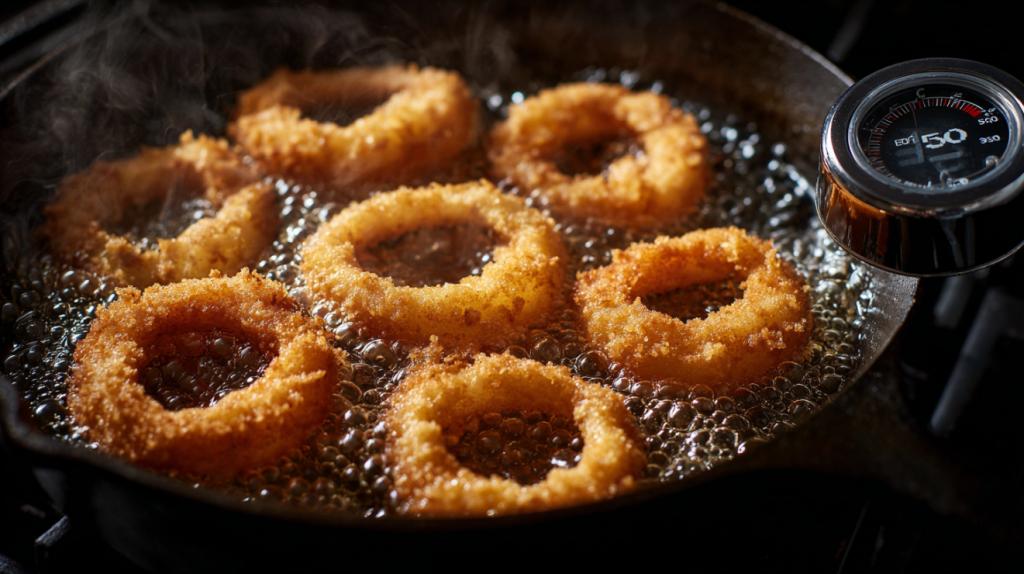
Clip your thermometer to the side of the pot and bring the oil to 350°F. This temperature is not a suggestion — it is the sweet spot. Below 325°F and your rings will absorb oil and turn greasy. Above 375°F and the outside will burn before the onion inside has time to cook through. You want that steady 350°F, and you want to watch it throughout the process because every batch of cold rings you add will drop the temperature.
The USDA’s guidelines on safe frying temperatures are worth reviewing if you are new to deep frying — they cover everything from oil selection to fire safety.
Frying to Perfection
Lower the rings into the oil gently, four or five at a time. The moment they hit the oil, you should hear a vigorous, steady sizzle — not a violent spatter, and not a quiet bubble. That steady sizzle tells you the temperature is right. If the oil barely reacts, it is too cool. If it spatters angrily and the rings immediately start darkening, it is too hot.
Let them fry undisturbed for about two minutes on the first side. Resist the urge to poke at them. When the bottom edge turns a deep, rich gold, use tongs or a spider strainer to flip each ring. Give the second side another two minutes or so. You are looking for an even golden-brown color all the way around — the color of a good caramel, not the color of a paper bag. If parts are still pale, let them go a little longer.
When they come out of the oil, transfer them to a wire rack — never to a paper towel-lined plate. Paper towels trap steam underneath and make the bottom of the ring go soft. A wire rack lets steam escape so the crust stays crispy on all sides. Hit them with a pinch of flaky sea salt the second they come out, while the oil on the surface is still hot enough to grab and hold the salt.
Let your oil come back to 350°F before adding the next batch. This usually takes a minute or two. Patience here is the difference between every batch being perfect and the last batch being a greasy mess.
What to Serve Alongside These Onion Rings
These are a natural fit right alongside a good burger, a plate of fried catfish, or a basket of fried chicken. I have served them as a side for pulled pork sandwiches and they disappear before the sandwiches do. They are the kind of thing that makes a regular Tuesday dinner feel like a backyard cookout.
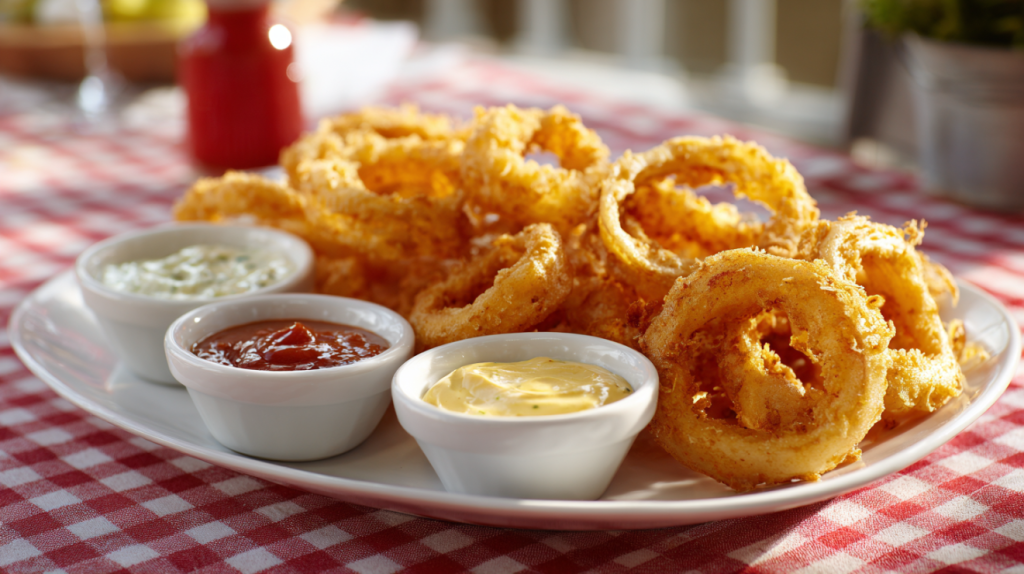
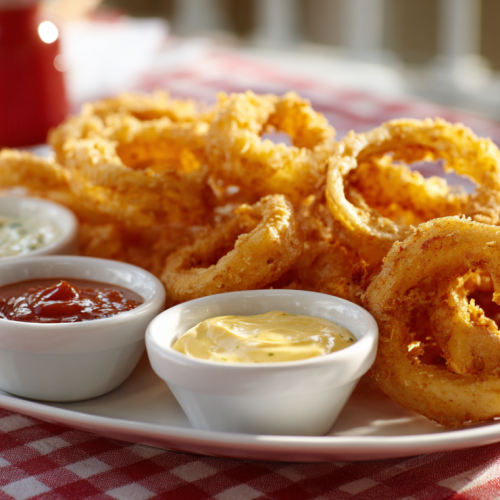
For dipping, you cannot go wrong with a classic comeback sauce — equal parts mayonnaise and ketchup with a squeeze of lemon, a dash of hot sauce, and a little garlic powder. Ranch dressing is always welcome, and a homemade honey mustard is a nice way to play off the sweetness of the Vidalia onions. My grandchildren go straight for ketchup, and honestly, there is nothing wrong with that.
If you are putting together a whole Southern spread, pair these with coleslaw, baked beans, or a good potato salad. They also hold their own on a game day table next to wings and cold drinks. For more ideas on building a complete spread, I cover all the classic side dishes in The Art of the Vegetable Plate: How to Make a Meal of Sides.
Ways to Change It Up
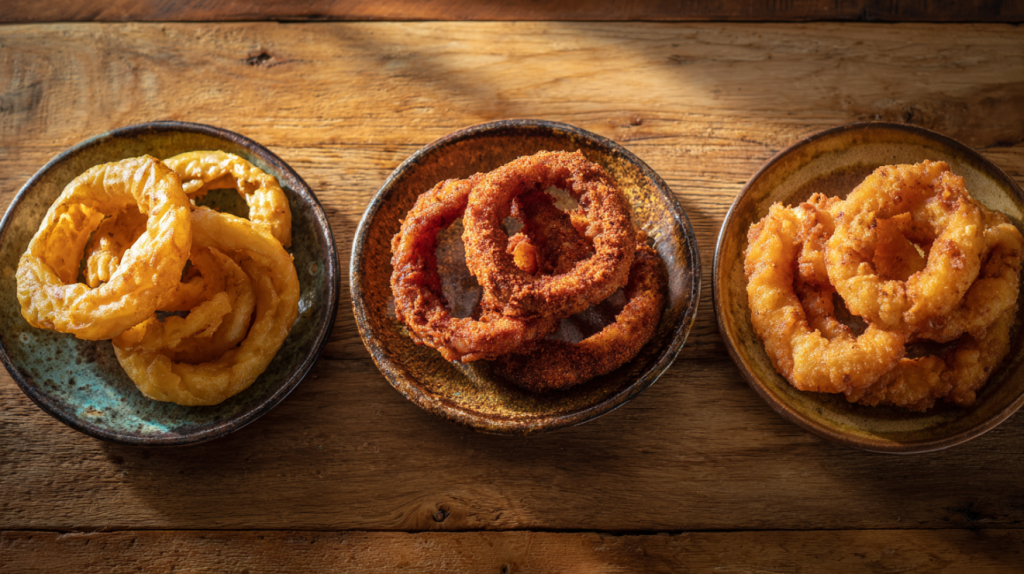
Beer Batter Onion Rings
Replace the buttermilk with a light beer — a lager or pale ale works best. The carbonation creates an incredibly airy, puffy batter that fries up almost like tempura. The flavor is a little more savory and less tangy than the buttermilk version. This one is a hit with the men at the cookout every single time.
Spicy Cajun Onion Rings
Double the cayenne in the dredge and add a teaspoon of Cajun seasoning. Toss a few dashes of hot sauce into the buttermilk soak for extra heat throughout. Serve these with a cool ranch or blue cheese dip to balance the fire. My youngest son requests this version every time he visits.
Cornmeal-Crusted Onion Rings
Replace half the flour in the dredge with fine yellow cornmeal. This gives the rings a rustic, slightly gritty crunch that reminds me of a good hushpuppy. The cornmeal adds a toasty flavor that pairs beautifully with fried fish. I lean into this one during catfish fry season. If you want to explore more ways to use cornmeal in your cooking, A Guide to Cornmeal: White vs. Yellow, Stone-Ground, and Self-Rising covers everything you need to know.
Parmesan and Herb Onion Rings
Toss a quarter cup of finely grated Parmesan and a tablespoon of dried Italian herbs into the flour dredge. The Parmesan adds a salty, nutty depth, and the herbs bring a warmth that is a little different from the traditional Southern version. These are wonderful alongside a steak or a good pasta.
Storing, Reheating, and Making Onion Rings Ahead
I will be honest with you — onion rings are at their absolute best within the first ten minutes of coming out of the oil. That is when the crust is at peak crunch and the onion inside is perfectly tender. But life does not always let you eat everything the moment it is ready, so here is how to handle leftovers.
Store cooled onion rings in a single layer in an airtight container in the refrigerator. They will keep for up to two days. Do not stack them or they will steam each other and turn soft. When you are ready to reheat, spread them in a single layer on a sheet pan and pop them in a 400°F oven for about eight to ten minutes, flipping halfway through. The oven crisps them back up beautifully. The air fryer works too — 375°F for about five minutes, shaking the basket once.
Do not microwave leftover onion rings. I know it is tempting, but the microwave turns them into limp, rubbery shadows of what they were. The oven or air fryer is the only way to bring them back.
As for making them ahead, you can slice and soak the onions in buttermilk up to a day before. You can also mix the dredge ahead of time. But do not coat the rings until you are ready to fry. A coated ring sitting in the refrigerator for hours will get soggy and will not fry up properly.
What to Do with Leftover Onion Rings
Loaded Onion Ring Nachos
Spread leftover onion rings on a sheet pan, top with shredded cheese, cooked crumbled bacon, pickled jalapeños, and a drizzle of ranch. Broil for two to three minutes until the cheese melts. This is the kind of snack that makes people forget it started as leftovers.
Onion Ring Burger Topper
Reheat two or three rings in the oven and stack them on top of your next burger. The crunch and sweetness of the onion takes a regular burger to something special. Add a smear of comeback sauce and you have a restaurant-quality meal at home.
Chopped Onion Ring Salad Croutons
Roughly chop reheated onion rings and use them in place of croutons on a wedge salad or a garden salad. They add a savory crunch that is far more interesting than bread cubes.
Onion Ring Grilled Cheese
Layer sliced onion rings inside a grilled cheese sandwich with sharp cheddar and a smear of Dijon mustard. Press it in a hot skillet until the bread is golden and the cheese pulls. This is one of those happy accidents that became a regular lunch in my kitchen.
Crispy Southern Onion Rings
Equipment
- Large heavy-bottomed pot or Dutch oven
- Deep-fry or candy thermometer
- Wire cooling rack set over a sheet pan
- Tongs or spider strainer
- Large mixing bowls
Ingredients
Onion Rings
- 3 large sweet onions Vidalia preferred
- 2 cup buttermilk
- 1 tsp hot sauce Crystal or Tabasco
Seasoned Flour Dredge
- 2 cup all-purpose flour
- 0.5 cup cornstarch
- 1 tsp garlic powder
- 1 tsp onion powder
- 1 tsp smoked paprika
- 0.5 tsp cayenne pepper adjust to taste
- 1.5 tsp kosher salt
- 0.5 tsp black pepper freshly ground
For Frying
- 4 cup peanut oil or vegetable oil enough for 3 inches of depth
- flaky sea salt for finishing
Instructions
Prep the Onions
- Slice onions into 1/2-inch thick rounds. Separate into individual rings, keeping only the larger and medium rings. Reserve the small inner rings for another use.
- Place onion rings in a large bowl. Pour buttermilk and hot sauce over the rings and toss gently to coat. Let them soak for at least 15 minutes while you prepare the flour mixture.
Make the Dredge and Coat
- In a separate large bowl, whisk together the flour, cornstarch, garlic powder, onion powder, smoked paprika, cayenne, salt, and black pepper until evenly combined.
- Working one ring at a time, lift from the buttermilk, shake off the excess, and press firmly into the seasoned flour on all sides. Shake off loose flour and place on a wire rack. Repeat with remaining rings.
- For an extra-thick crust, dip the floured rings back into the buttermilk briefly, then press into the flour a second time. Set coated rings on the rack and let them rest 5 minutes before frying.
Fry the Onion Rings
- Heat oil in a large heavy-bottomed pot or Dutch oven to 350°F (175°C). Use a deep-fry thermometer to monitor the temperature.
- Working in small batches of 4-5 rings at a time, carefully lower the onion rings into the hot oil. Do not crowd the pot. Fry for 2-3 minutes per side, turning once, until deeply golden and crispy.
- Transfer fried rings to a wire rack set over a sheet pan. Season immediately with a light sprinkle of flaky sea salt while they are still glistening. Let oil return to 350°F between batches.
- Serve immediately while hot and crispy with your favorite dipping sauces.
Nutrition
Rate This Recipe
Share This Recipe With The Ones You Love!Your Onion Ring Questions, Answered
Why does my batter fall off the onion rings when I fry them?
Nine times out of ten, the coating is falling off because the rings did not rest after breading. That five-minute rest on a wire rack is critical — it lets the buttermilk and flour bond into a cohesive coating. Also make sure you are shaking off excess buttermilk before dredging. Too much liquid creates a paste that slides instead of clings.
What is the best oil temperature for frying onion rings?
Aim for 350°F and hold it as steady as you can. A deep-fry thermometer is not optional here — it is essential. The temperature will drop every time you add a batch, so give it a minute or two to recover between rounds. Frying too cool makes greasy rings. Frying too hot burns the outside before the onion cooks through.
Can I make onion rings in an air fryer?
You can, and they turn out surprisingly well. Coat the rings the same way, then spray them lightly with cooking spray and arrange in a single layer in the basket. Air fry at 400°F for about ten minutes, flipping halfway through. They will not be quite as crispy as deep-fried, but they are a solid option when you do not want to deal with a pot of oil.
How do I keep onion rings crispy after frying?
Two things: drain on a wire rack instead of paper towels, and do not cover them. Paper towels trap steam against the coating and make it soggy. A wire rack lets air circulate on all sides so the crust stays crunchy. If you need to hold them for a few minutes, keep them in a 200°F oven on the rack. According to the food safety guidelines from Safety Culture, holding hot foods above 140°F is also important for safety, so that warm oven does double duty.
What kind of onion is best for onion rings?
Sweet onions are the gold standard. Vidalia, Walla Walla, and Maui varieties all have the high sugar content and mild flavor that make onion rings taste their best. Regular yellow onions work if that is what you have, but expect a sharper flavor. I would avoid white onions and red onions — white are too pungent, and red bleed color into the batter.
Can I use a gluten-free flour for this recipe?
Yes. Use a 1:1 gluten-free all-purpose flour blend and keep the cornstarch. The coating may be slightly more delicate, but it will still fry up crisp and golden. The cornstarch does most of the heavy lifting for crunch, so the swap works well here.
How thick should I slice the onions?
About half an inch is the sweet spot. Thinner rings overcook and turn floppy before the crust finishes browning. Thicker rings take too long to cook through, so the crust over-browns while the onion inside is still crunchy. Half an inch gives you a tender ring and a crispy shell that finish at the same time.
Now Go Make Them
This onion ring recipe is one of those things that looks simple but rewards real attention to detail. The right onion, a good buttermilk soak, a seasoned dredge with cornstarch for crunch, and steady oil temperature — that is the whole formula. Once you make them this way, the frozen bags and drive-through orders just do not hold up anymore.
I hope you give these a try this week. Make a big batch, invite somebody over, and see what happens when you put a plate of hot, homemade onion rings on the table. Then come back here and tell me how it went — I always love hearing how these recipes turn out in your kitchen. If you are looking for more recipes and techniques that have been passed down and tested over a lifetime, explore The Complete Guide to Southern Cooking: Techniques, Traditions & Time-Tested Wisdom — everything I know is right there waiting for you.